There would be a loss of quality, but the difference would be negligible to most listeners using standard speakers or headphones. If you’re an audiophile, then in addition to having expensive audio equipment, you’re probably never going to use the MP3 format anyway.Most likely you’ll be using a compressed or uncompressed lossless format like PCM Audio, WAV, AIFF, FLAC, ALAC, or APE. An uncompressed PCM audio file is about 10 times bigger than a CD quality MP3 file.The MP3 format is a lossy format, which means audio quality is sacrificed in order to keep the relatively small size of the files. Pretty much every site will tell you that you should never convert a lossless format audio file to MP3 format unless you are OK with losing some audio quality.This is true almost all of the time. The only time it might make sense is if you have a lower bitrate audio file in a high quality format like WAV. For example, it might make sense to convert a 96 kbps WAV file to MP3, but only if you choose a bitrate of 192 kbps or higher. The higher bitrate on the MP3 file will allow it to maintain the same quality as the WAV file, even though it is a lower bitrate.The second thing you’ll read is that you should never convert a lower bitrate stream to a higher bitrate stream and hope that it sounds better. You cannot gain quality by increasing the bitrate. This is exactly correct. You will actually reduce the quality of your MP3 file if you try to convert up the bitrate.If you want a higher bitrate MP3 than you currently have, you need to go back to the source (CD, etc) and extract that audio at full quality. Then you can convert that file into a higher bitrate MP3 file.The last thing you should know is that it is not advisable to convert between lossy formats as you will continue to loss quality. It is OK, however, to convert between lossless formats as the quality is retained.So now that you understand a few of the basics of the best ways to convert audio files to different bitrates, let’s talk about the programs that can help us. Note that I checked all of these programs on VirusTotal to make sure they are 100% clean.
MP3 Quality Modifier
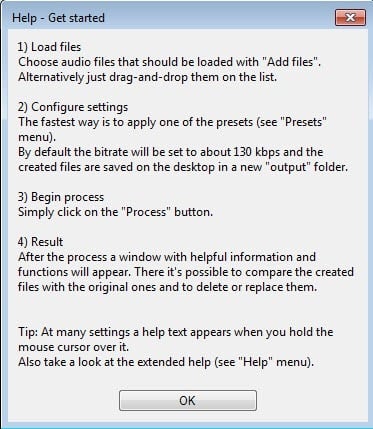
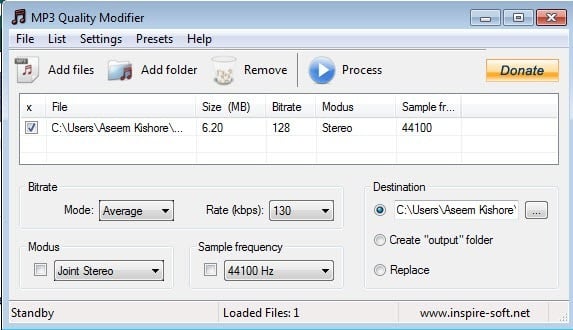
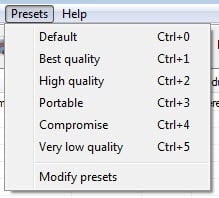
MP3 Quality Modifier is a small freeware program for Windows that is simple to use and works very well. It also doesn’t contain any malware or useless offers when installing it.What I like about this program is that it doesn’t even require any installation, you can just run it by opening the EXE file. On startup, it gives you a little welcome window and explains how to use the program, which is nice.To get started, just click on the Add Files or Add Folder buttons at the top. This program only works with MP3 files, so if you are looking to convert a WAV or FLAC file into MP3, check out more of the programs mentioned below.By default, it picks a bitrate of 130 kbps, which is about medium quality. It also lists out the size, bitrate, modus and sample frequency for the MP3 files you have added. As mentioned, this program make sense if you are converting from a higher to lower bitrate.You can also click on Presets and choose from different options like Best Quality, High Quality, Portable, etc.
AmoK MP3 ReEncoder
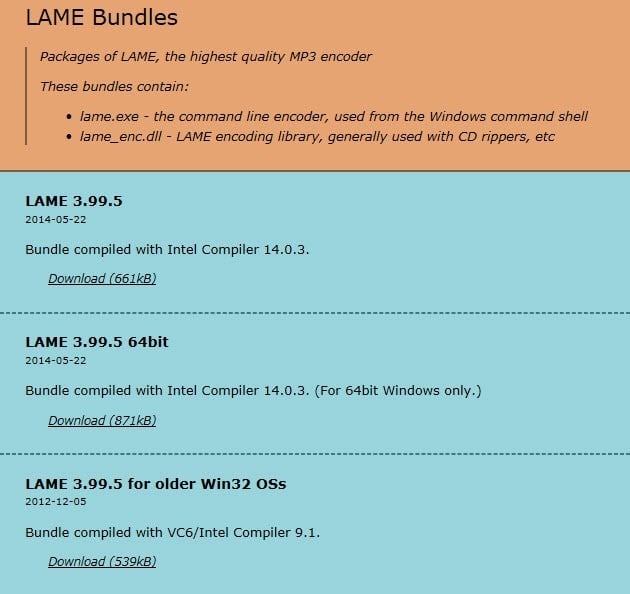
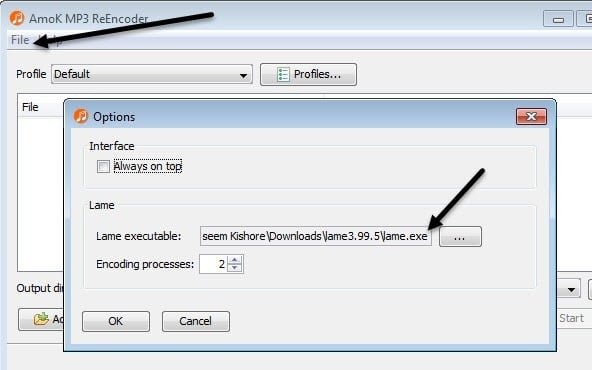
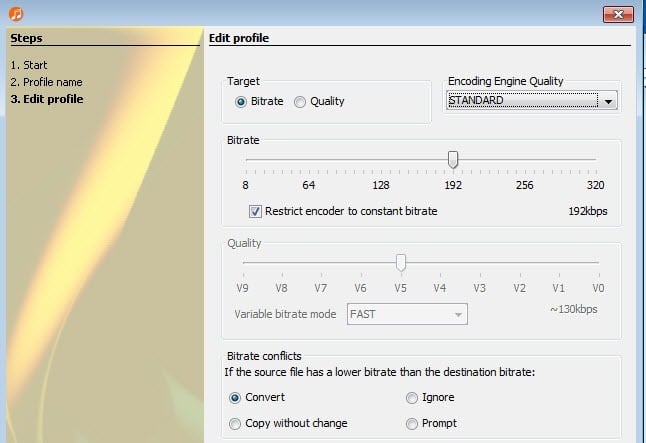
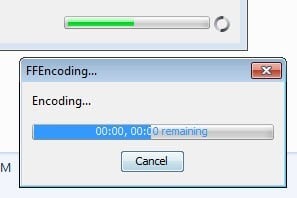
Another free encoder you can use is AmoK MP3 ReEncoder, which can take MP3, FLAC or WAV as inputs. You can also run this program by just double-clicking on the EXE file.Once you have it running, you need to download the LAME encoder, which is a separate download. You can download the latest version, 3.95.5, from the RareWares page.Note that there are a couple of options. The first one is for 32-bit Windows, the second is for 64-bit, etc. If you need to convert FLAC files, you need to download the 4th one that says it supports FLAC and OGG input support.Once you have that downloaded and unzipped the files, go to the ReEncoder program and click on File and then Options.Under Lame, click on the little box with three dots and then navigate to the location of the lame.exe file you just downloaded. Click OK and then make sure to choose an Output directory also.The default profile will have a bitrate of 192 kbps, but you can click the Profiles button and create a new profile.You can then select Bitrate and adjust it using the slider. Once you have the settings chosen, click the Add Files or Add Folder button to add your audio files.Click the Start button and a little progress bar and window will appear showing you how long it will take.The only issue with this program was that I was not able to get it to convert a WAV file into an MP3 file. For whatever reason, it just didn’t do anything when I chose a WAV file. Maybe I configured it incorrectly, but if you need to convert from WAV to MP3, check out the last program below, which worked.
Fre:ac – Free Audio Converter
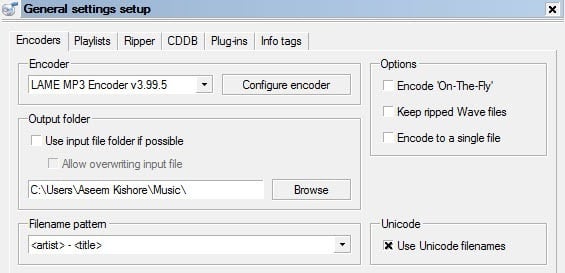
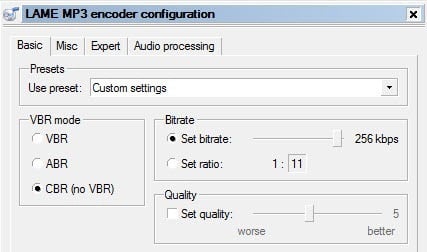
Fre:ac is another open source project that has the most options for converting between audio formats. It includes several encoders by default, so you don’t have to go and download separate files for WAV, FLAC, etc.Once you install and run it, click on File, then Add and then Add files.Next, click on Options and click on General Settings.Here the main setting is the encoder. By default, it is the LAME MP3 Encoder, which you can use to convert other audio formats into MP3 format. However, if you want to convert an audio file to FLAC, OGG, WAV or BONK, just select the appropriate encoder.Next, click on Configure Encoder to change the settings for the LAME MP3 encoder. By default, it’s going to be set to Standard, Fast, which doesn’t give you a very high quality MP3 file.Under Use preset, change it to Custom setttings. Now you can pick from VBR, ABR and CBR. These standard for Variable, Average or Constant Bit Rate. For the best quality, you’re going to want to go with CBR, which also means your MP3 file will be a bit larger.You can then adjust the bitrate to the desired value and also adjust the quality too. The higher the setting, the better quality sound, but the bigger the file.Click OK a couple of times to get back to the main screen and then click on the Play button at top to start the encoding process. In my example, I converted a 6 min 45 sec 68 MB WAV file to a 12 MB 256 kbps MP3 file using this program. If you go with the default settings, you’ll get a 4 MB MP3 file.Hopefully, this gives you a good overview of what bitrate is and how you can adjust it depending on what kind of audio file you have. If you have any questions, feel free to comment. Enjoy!
