And if you’ve read anything online, you probably heard about the Wired writer Mat Honan, who got hacked and had his iPhone, iPad and MacBook Pro completely wiped by hackers and lost all of his precious photos and videos of his daughter because he didn’t make a backup.I quickly realized after reading that article that if someone were to wipe my iPhone, iPad and MacBook Pro, I would lose a whole lot of very important data. I do backups regularly using Time Machine and I have iCloud Backup enabled on my iPhone and iPad, but because my data is fragmented all over the place, I would still lose a lot of stuff.This got me to go through all my photos and videos and settings on my devices and make sure all the current stuff was backed up externally and any new videos and photos taken on my iPhone would be automatically backed up. In this article, I will walk you through what I have done to properly backup all my iPhone/iPad/MacBook data, including photos and videos.
Method 1 – iTunes/iCloud
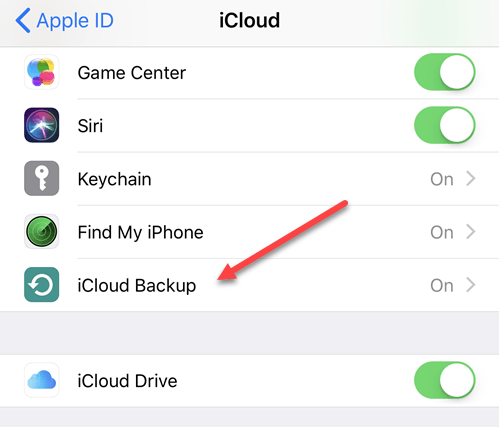
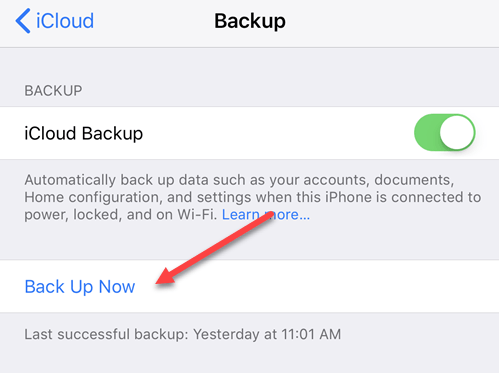
The easiest way to backup everything is to use iCloud or iTunes. Open iTunes, connect your device and then right-click on it and choose Backup:This will manually backup your device to iTunes on the local computer. Note that if you have iCloud backup turned on, you can still locally backup your device using this method. I highly recommend doing a backup in iTunes also as I’ve tried to restore an iCloud backup before and it didn’t work. iCloud is nice, but it’s the cloud and the cloud can act finicky sometimes.Also, be sure to encrypt the backup when you perform a local backup as that will allow other secure data to be backed up also.To turn on iCloud backup, go to Settings on your device, tap on your name, then tap on iCloud and then tap on iCloud Backup towards the bottom.Turn it on and then either let the device backup on its own or you can manually perform a backup to iCloud if you don’t want to wait. Make sure your device is connected to a power source and WiFi before starting the backup.The only thing about backing your devices up this way is that if you delete a single video, for example, and want to restore that, you have to do a complete restore of the device. Now it’s great if your device gets wiped completely, then you can restore the whole thing from backup and you’ll have all your photos and videos plus everything else.However, the best option is to also enable iCloud Photo Library (Method 2 below), which is much more convenient for managing your photos and videos. Note that you should also keep iCloud Backup enabled too.
Method 2 – iCloud Photo Library
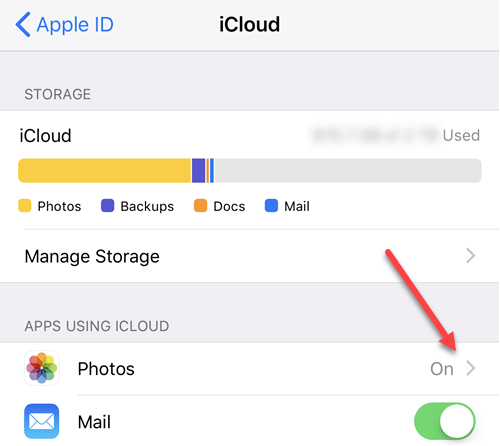
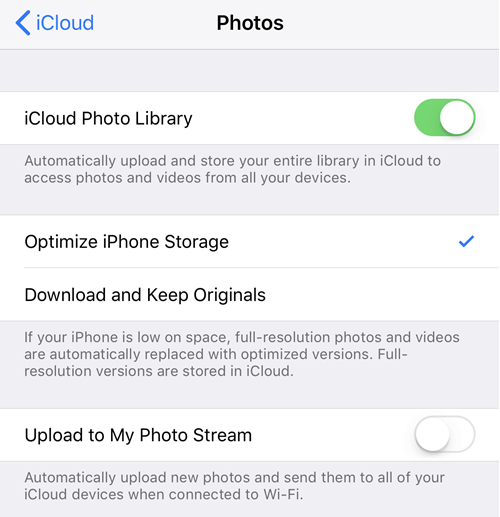
If you pretty much exclusively take photos and videos from your Apple devices, then it’s well worth the money to use iCloud Photo Library. By default, Apple is super stingy and only gives you 5 GB of free iCloud storage. This is not nearly enough if you use your iPhone as the primary camera.Luckily, iCloud isn’t terribly expensive. For $1 a month, you get 50 GB of storage and for $3 a month, you get 200 GB of storage. After that, it simply jumps to 2 TB for $10 a month, which is a whopping amount of space.To enable iCloud Photo Library, go to settings, tap on your name, tap on iCloud and then tap on Photos.Go ahead and turn it on make sure to check Optimize iPhone Storage unless you have a a lot of space on your device for storing all that media.Now any device that is signed in using your iCloud ID will be able to view all the videos and pictures. This is great if you have a Mac, where you can also use the Photos app in conjunction with iCloud Photo Library.
Method 3 – Photos App
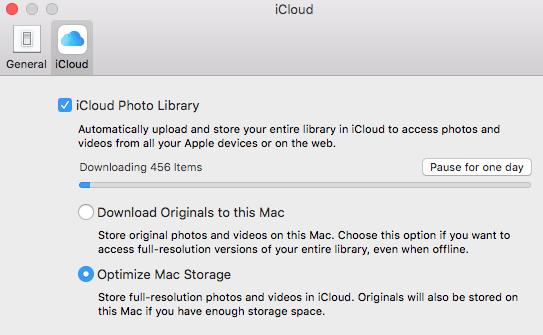
As mentioned, the Photos app is a great tool for managing your library if you already own a Mac. The Photos app comes in handy for those folks who still want to take higher quality pictures and videos with a dedicated camera, but want to to be able view all of that in their iCloud Photo Library too.You can set it up so that whenever you connect your device to your Mac, it will automatically import all of the photos and videos. After the import, you can choose whether to keep them on the device or delete them. If iCloud Photo Library is enabled, all of the imported media will be uploaded and visible across all your devices.To enable iCloud Photo Library on your Mac, click on Photos in the menu bar and then click on Preferences.You have similar options on your Mac as on the iPhone: Download Originals or Optimize Mac Storage. If you have a large hard drive and can accommodate your entire iCloud Photo Library on the local hard drive, I recommend choosing Download Originals to this Mac. In case something goes horribly wrong with iCloud, you’ll have a full backup of everything on your local device.The only thing I don’t like about the Photos app is that everything is stored in a proprietary Apple format and not accessible by any other application. I used to love using Google Picasa, but that hasn’t been updated in years.
Method 4 – Google Photos/Cloud Storage
The last method and the one I use the most is to backup to Google Photos. You can download the Google Photos iPhone and iPad apps and have your photos and videos automatically uploaded. Personally, I use both Google Photos and iCloud to create two copies of all my photos and videos. It may seem like overkill, but I’m just overly paranoid.On Google Photos, tap on the three horizontal lines, then on the gear icon. Tap on Backup & Sync and turn it on. It will then start syncing everything in your iCloud Photo Library up to Google Photos. If you already have a large amount of media in your photo library, Google Photos will sync the entire library.The big problem with this is that it will force your device to re-download all the content from iCloud so that it can upload it to Google Photos. This means your device will run out of space for a while until the upload it finished.It is definitely inconvenient, especially the first time, but it’s proved very useful for me on many times. I have taken videos and that same day they have been deleted by my iPhone-loving daughter! That’s why I make sure it gets backed up in multiple locations just in case.The other major reason I backup to Google Photos is that it links to Google Drive. With Google Drive, you can sync your entire photo library to another computer or even a network device like a NAS. iCloud also has a Windows program for syncing everything down to a PC, but I’m not a huge fan of how it works.Besides Google Photos, you can really use any cloud service you want. Dropbox, OneDrive and other cloud services all work the same way, so if you are already tied into a service, continue using that one. What method do you use to backup your iPhone/iPad photos and videos? Let us know in the comments. Enjoy!

