An example of a MAC address is 1F-2E-3D-4C-5B-6A and it falls into the Layer 2 networking protocol of the OSI model. In today’s networks, ARP, or Address Resolution Protocol converts a MAC address to a Layer 3 protocol address, such as an IP address. A MAC address can also be called a Physical Address. Read my post on how to find your MAC address if you don’t know it.All MAC addresses are hard-coded into a network card and can never be changed. However, you can change or spoof the MAC address in the operating system itself using a few simple tricks.So why would you want to change your MAC address? Well there are many reasons for this, mostly related to bypassing some kind of MAC address filter set on a modem, router or firewall. Changing the MAC Address can help you bypass certain network restrictions by emulating an unrestricted MAC Address or by spoofing a MAC address that is already authorized.For example, a WiFi network may allow only authorized computers to connect to the network and filters out computers based on the MAC address. If you can sniff out a legitimate MAC address, you can then spoof your MAC address and gain access to the WiFi network.Another example is if you have an ISP that allows only a certain number of computers to connect to the Internet from your home. If you have more computers that need to connect, you can spoof the MAC address of an authorized computer and connect from a different computer.
Change Windows MAC Address
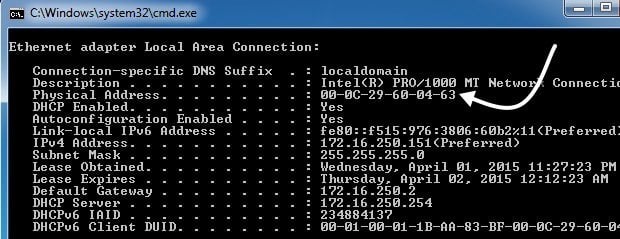
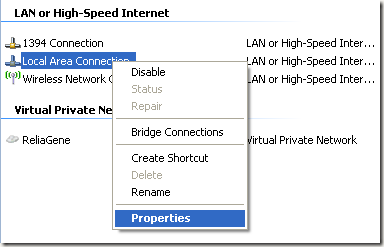
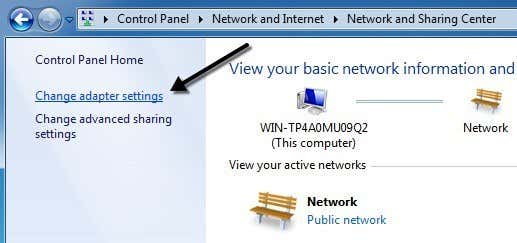
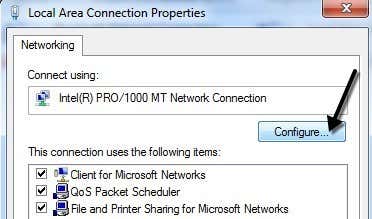
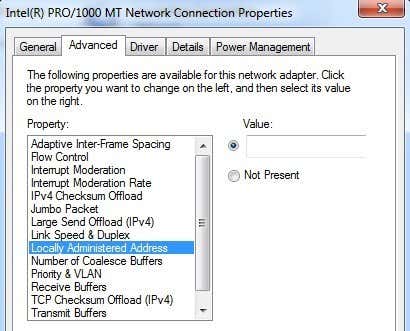
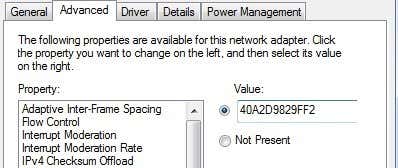
You can change the MAC address for the network card in Windows pretty easily following the steps below.Step 1: Click on Start, then Control Panel, then Network Connections, and right-click on the network connection you want to change the MAC address for and select Properties. It will normally either be Local Area Connection or Wireless Network Connection.If you are using Windows Vista, Windows 7 or higher, you have to go to Control Panel, then Network and Internet, then Network and Sharing Center, and then click on Manage Network Connections or Change adapter settings.Then you can right-click on the adapter and choose Properties.Step 2: On the General or Networking tab, click the Configure button.Step 3: Now click on the Advanced tab and click on the Locally Administered Address property or the Network Address property.By default, the Not Present value is selected. Go ahead and click on the Value radio button and enter in a new MAC address. The MAC address is a combination of 6 pairs of numbers and characters, i.e. 40-A2-D9-82-9F-F2. You should enter the MAC address without the dashes.You can go to the command prompt and type in IPCONFIG /ALL to check that the MAC address has been changed. Go ahead and restart the computer in order for the changes to take effect.This is the simplest way to change your MAC address in Windows. You can also do so via the registry, but it’s much more technical and probably not required by most people.
Change OS X MAC Address
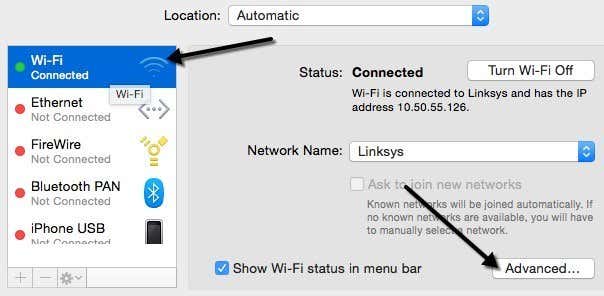
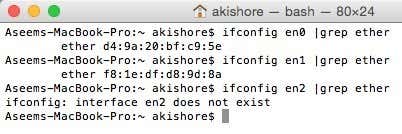
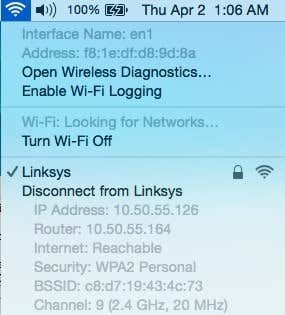
Changing the MAC address on OS X is definitely not as easy as it is on Windows. Firstly, you have to use Terminal (similar to command prompt in Windows) to actually change the MAC address.Secondly, you need to manually figure out the technical name of the adapter before you can change the settings. I’ll explain everything below step by step, but it gets a bit complicated at times.To start, let’s find out the current MAC address for your Mac. You can do this in one of two ways: via System Preferences or via Terminal. Open System Preferences, click on Network and then click on the Advanced button. Make sure to select the appropriate interface first (WiFi, Ethernet, etc) in the listbox on the left.Click on the Hardware tab and you will see the first line is MAC Address. I thought you could simply choose Manually from the Configure dropdown, but that doesn’t allow you to edit the MAC address.In Terminal, you can get the MAC address by typing in the following command:This will give you the MAC address for the en0 interface. Depending on how many interfaces you have on your computer, you might need to run this command several times adding 1 to the number each time. For example, I ran the following commands below until I reached an interface that didn’t exist.Now you can simply compare the MAC addresses listed here with the one you saw via System Preferences. In my case, my WiFi MAC address of f8:1e:df:d8:9d:8a matches with en1, so that is the interface I have to use for the next commands.Before we change the MAC address, you can use a useful command in Terminal to generate a random MAC address if you need one.Now that you have a new MAC address, you can change the current one using the following command below. Replace XX with the actual MAC address you want to use.In order to do this, you need to be logged in as an Administrator or you have to enable the root account in OS X. By default, root is disabled and it’s better to leave it disabled if you can. Just login as an admin and you should be able to run the command just fine. It will ask you for your password, though, before changing the MAC address.Also, the address won’t change if you are still connected to a WiFi network. You need to first disconnect from any networks and then run the command. Surprisingly, disconnecting from a wireless network in OS X is not intuitive at all. You have to press and hold the Option key and then click on the WiFi icon to see the disconnect option.So here is a rundown of all the commands I ran in order to get the current MAC address, generate a random one, update the MAC address and then verify to make sure it had actually changed.As I mentioned earlier, this is definitely not as straightforward as the process is on Windows, but you should be able to do it if you simply copy and paste the commands above. If you have any questions, feel free to post a comment. Enjoy!
