This is why adding audio narration to PowerPoint slides timings is helpful and useful. You can record the narration from inside your presentation so that it plays while viewers watch. Adding voice-over narration to your Powerpoint presentation or video will turn it into evergreen stand-alone content.This article will discuss how to add audio narration to a Powerpoint presentation for Windows 10.
Test Your Default Microphone
The first thing you will need is a working microphone. Most computers today come with a built-in microphone. If you plan to use your computer default microphone, you don’t have to take additional steps to add a microphone.However, you do want to make sure it’s working and loud enough to hear. To set your default microphone, test it to make sure it’s working. To customize the properties, follow the steps below.
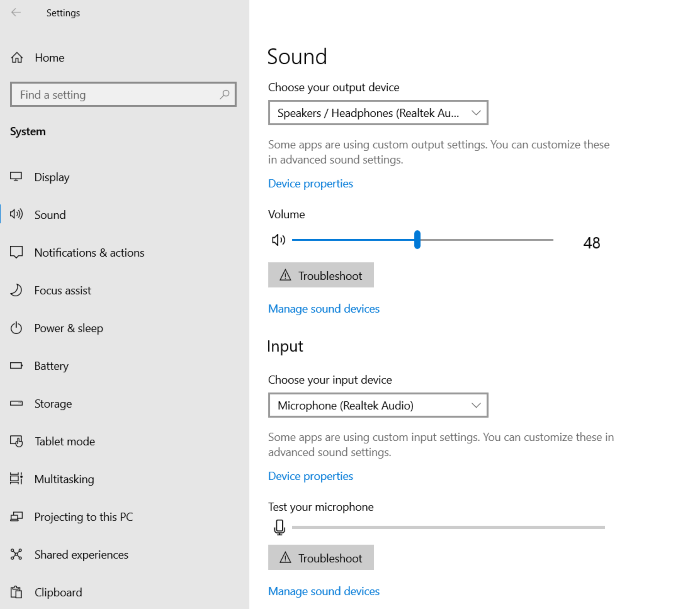
Start by typing Settings in the search bar.Click on System > Sound.
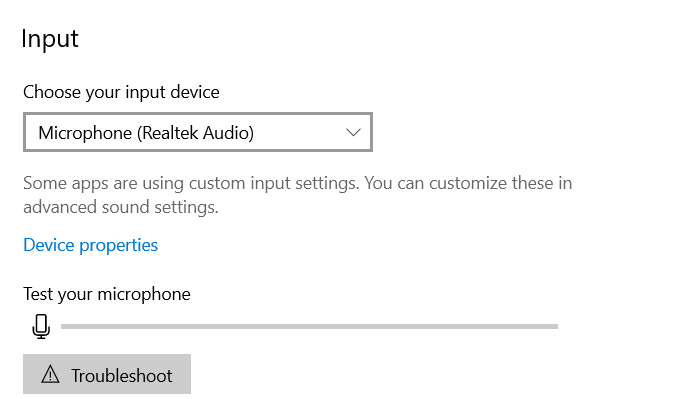
Look under Input for options to configure your microphone. Click the dropdown menu under Choose your input device to assign your default microphone.If you only have one microphone, there is nothing to select. To open additional microphone settings, click on Device properties > Additional device settings.
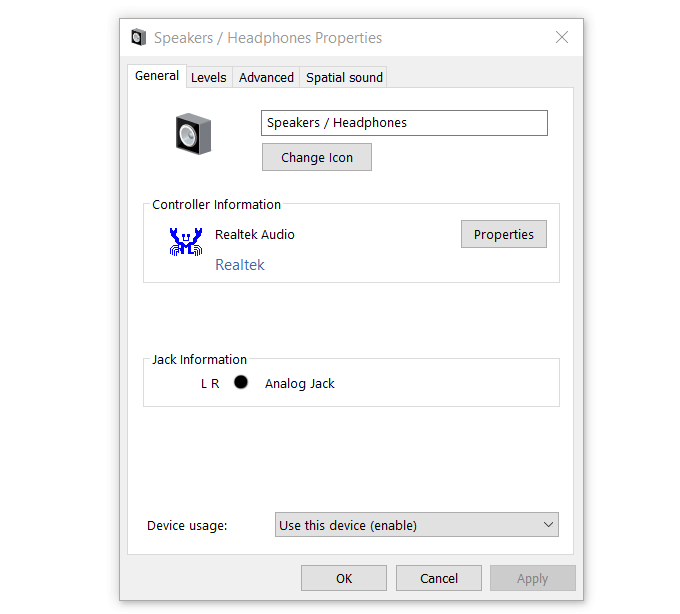
Enable or disable speaker and access audio driver information under the General tab.The Listen tab enables you to allow or deny your mic to listen to the speakers.Adjust the microphone volume and balance settings under Levels.Change the default sample rate and bit depth under the Advanced tab.If enabled on your computer, Spatial sound can enhance the audio experience.
To test your microphone, go back to the Input section. If it’s not working, you can use the Troubleshoot button to try to resolve the issue.
Install a USB Microphone
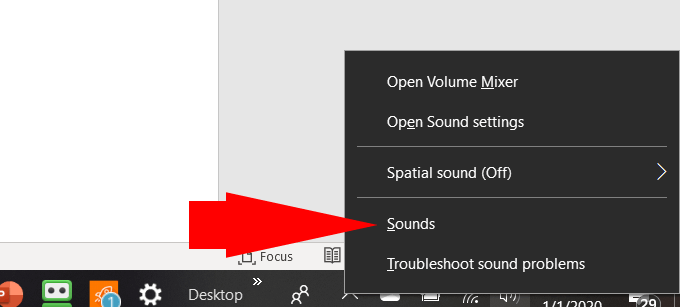
To enable your microphone, first, plug in the USB microphone to your computer. Then right-click on the volume icon on the taskbar. Click on Sounds.
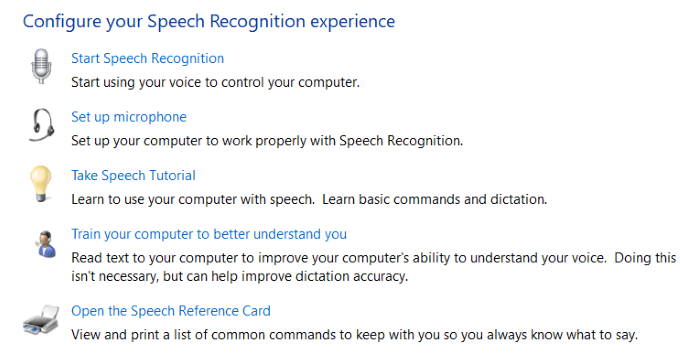
Under the Recording tab, choose the microphone you want to set up and click Configure. Under Configure your Speech Recognition experience, click on Set up microphone.
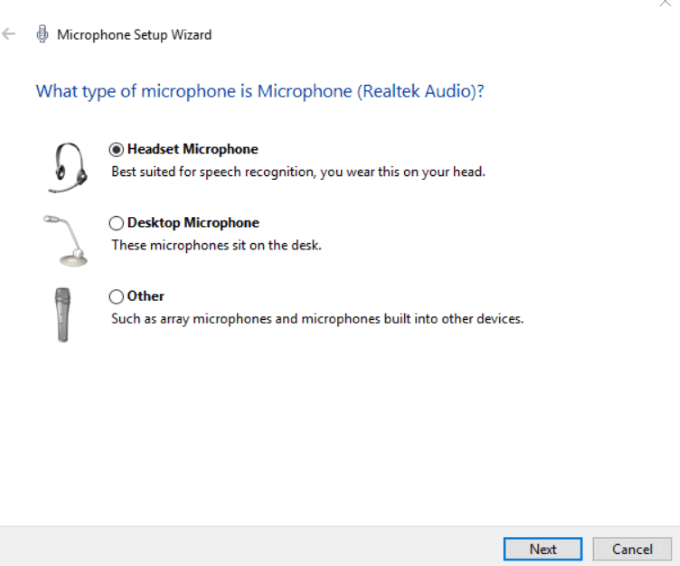
When the setup wizard starts, choose the type of microphone you are installing and click Next.
The next screen you see will provide tips for using your microphone and some text to read to test your settings. Follow the instructions from the wizard and test the microphone to make sure it is working correctly.
Set USB Microphone As Input Device To Use
If you want to use the external USB microphone you just set up to record your narration, you need to set it as the input device.
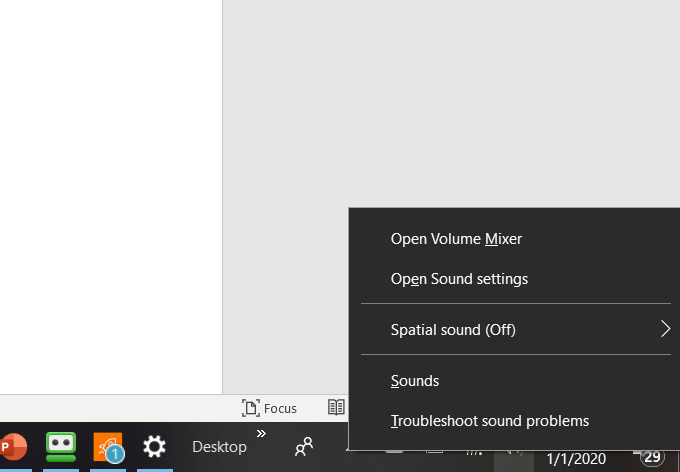
Right-click on the volume icon on the right side of the taskbar and click on Open Sound settings.
From the Sound Settings window, scroll down to Input and tick the box under Choose your input device. Select your USB microphone as the input device.
Rehearse & Take Notes
Now that your microphone is set up and tested, instead of jumping right in and starting to record, take the time to practice what you are going to say.Take notes, write out a script, and rehearse the timings to save time, minimize errors, and ensure that your audio sounds fluid and natural.Now you are ready to start recording.
Turn On the Recording Tab (Office 365)
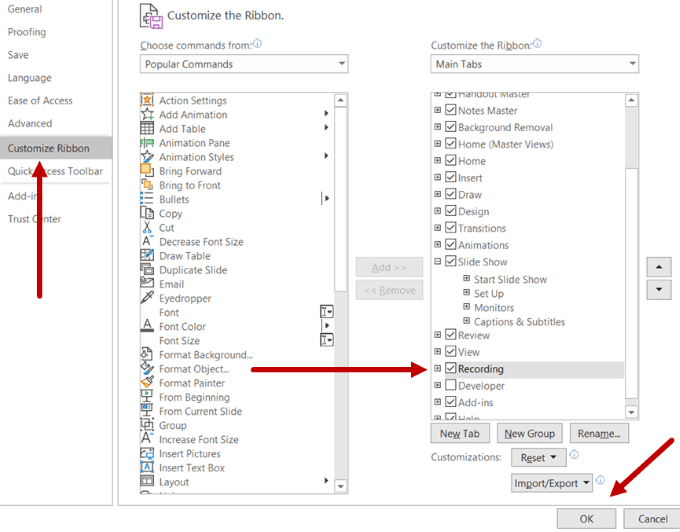
To turn on the Recording tab, navigate to File, click Options > Customize Ribbon > Recording > OK.
How To Record An Audio Narration For One Slide
The easiest way to add audio to your PowerPoint presentation is to record one slide at a time.
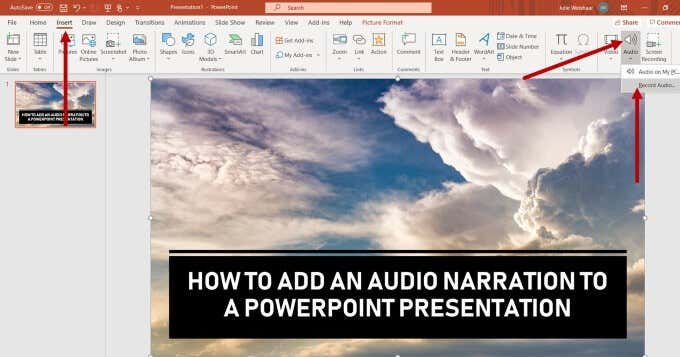
Start by selecting the slide where you want to add the audio.Navigate to Insert > Audio > Record Audio.
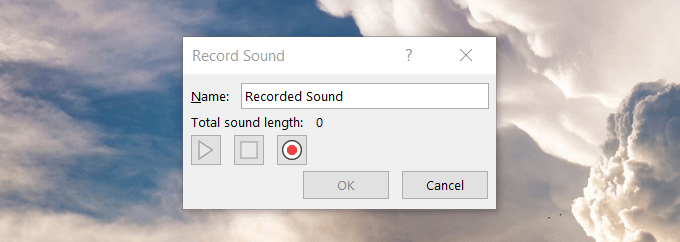
Choose a name for your voiceover and replace Recorded Sound with the name.
To start your recording, click the button with the red dot. Read from your script and click the stop button when finished. The stop button is the middle square and will be highlighted in red while you are recording.
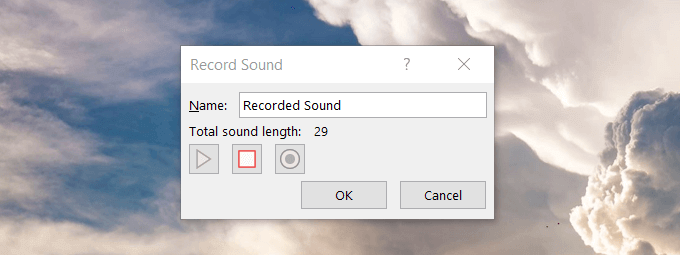
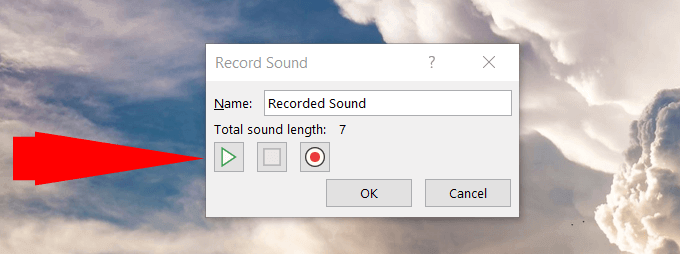
To hear your recording, press the play button. If you like how it sounds and want to keep it, click OK.
You can also hear the audio by clicking on the embedded audio icon on your slide. It will open a bar underneath where you can play your audio.
You will now have a visible audio icon on your slide. To hide this icon for your final presentation, click on it. Click Playback in the top bar navigation, and tick off Hide During Show.
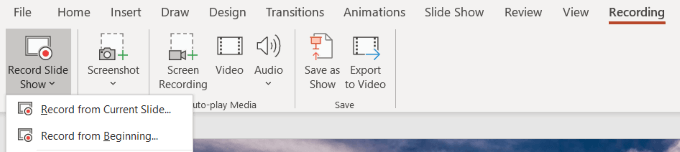
Record An Audio Narration For An Entire Slideshow (Office 365)
Click on Recording from the top navigation, and then Record Slide Show.
Choose either Record from Current Slide or Record from Beginning. The slideshow will open in the Recording window.
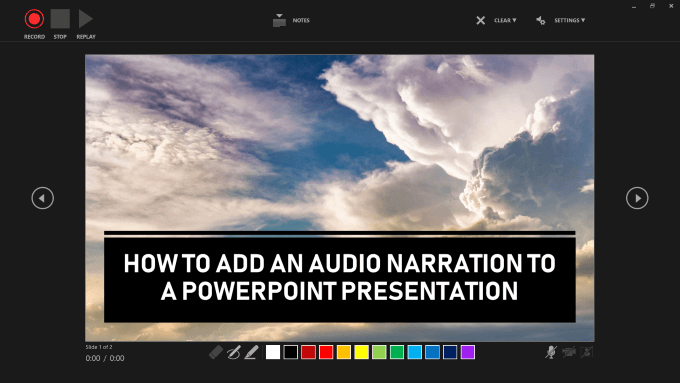
There are buttons on the top left for recording, pausing, stopping, and playing. Click on the red, round button to start recording. There will be a three-second countdown for you to get ready.The slide you are recording will show up in the main pane of the window. To advance to the next slide, use the arrow on the right side of the window. To move to a previous slide, use the arrow on the left. Powerpoint with Office 365 will automatically record the time you spend talking on each slide. This includes any animations you have set up.Use the buttons on the bottom right-hand side of the screen to toggle your microphone, camera, and camera preview on or off. If you choose to re-record part or all your narration, Powerpoint will erase the old version to enable you to record again.When you finish recording, click on the square button at the top left-hand corner of the recording window.
The timings for each slide will show up in the Slide Sorter view. To see your timings, click on View > Slide Sorter.
See the timings under the slides from the Slide Sorter view in the image below.
Preview Your Slide Show
To preview your slideshow with your narration, animations, and timings (set up before you started recording), click Slide Show from the top bar navigation. Make sure you are on the Home tab.Choose From Beginning or From Current Slide.
To hear the audio for a single slide, go to Normal view, click on the sound icon and click Play. Note that recorded animations won’t show up when previewing from a single slide.
Manually Set Slide Timings
You can also manually set your slide timings to sync with your narrations. To do so, select the slide from Normal View and then click on Transitions. From the Timing group, select the After check box under Advance Slide.
Enter how long you want the slide to stay on the screen before moving onto the next. Do this for every slide you want to use manual timings.
Publish Your Presentation For Sharing
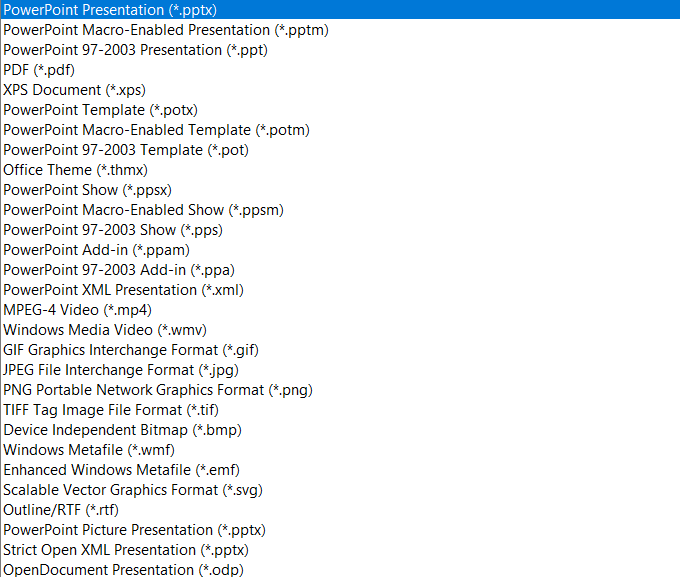
You can save your presentation as a Powerpoint Show (.ppsx) or a video to share it with others. When a viewer opens a slideshow file, it will immediately open in slideshow mode.To save your presentation, go to File, Save As and select the format from the dropdown menu.If your presentation is huge and you want to send it as an email attachment, you might need to compress the file. A better option is to upload it to Dropbox, OneDrive, or Google Drive, and send the link to the desired recipients.

![]()