Another problem with Windows Movie Maker is that you can’t create subtitles that show up as an option in DVD players; it’s either always there or not. After doing some research, I found that the best way to add subtitles to a video semi-professionally is to use a combination of programs, one that specializes in creating high-quality subtitles that match your video exactly and another program that takes the subtitles and encodes them with the video.So here’s a guide that will teach you how to add subtitles to videos for free and hopefully not make you completely frustrated! To get started, you first need to download and install two applications. I’m going to write how to use Handbrake first because it’s the easier program, but if that doesn’t work for some reason, you can try TEncoder as a backup.Download and unzip Subtitle WorkshopDownload and install HandbrakeDownload and install TEncoder – Optional
Create Subtitles File (SRT)
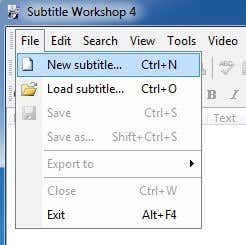
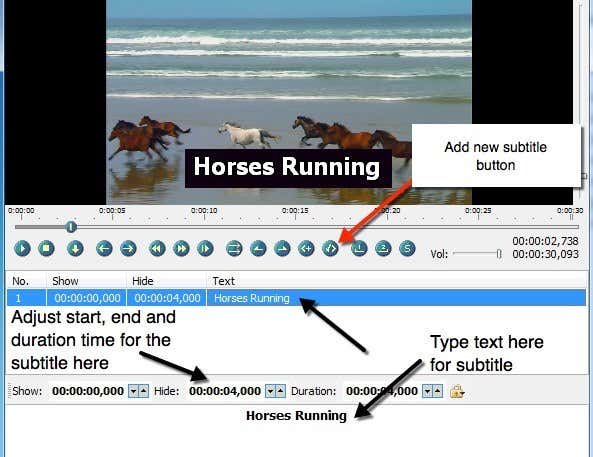
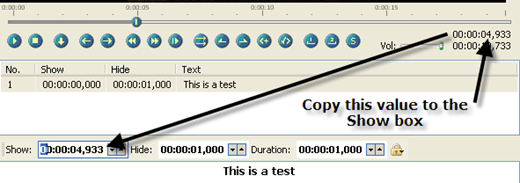
Subtitle Workshop only needs to be unzipped to run, there is no install. Just double click on the SubtiteWorkshop4 icon. This is the first application we will start with. Subtitle Workshop will allow us to add as many subtitles as we want into our video and save that file out as a separate file (our video will remain unaltered at this point).After you open Subtitle Workshop, click on File and choose New Subtitle.Then go to the Video menu option and choose Open. Choose your video and click Ok and you video will appear in the top section and start playing. Go ahead and move the slide bar to the location where you want your first subtitle to appear and then click on the first row in the main list box that says No. 1, Show, Hide, etc.To add your subtitle, begin typing your text into the text box at the bottom. You should see it appear on the video as you type. Now when you add subtitles, you’ll see that there is a Show and Hide section visible in the above screenshot. You have to type in the exact times that you want the subtitles to appear since it does not just pick the value from the location that you are in the video.In order to get the current frame that you are in while playing the video, look at the right side of the screen below the video. You’ll see those numbers just like they are in the Show/Hide boxes. Just take the value from the top one and add that into the Show box. For example, I want my first subtitle to come up 5 seconds into the video and last 5 seconds.So I can either type in 00:00:05:000 into the Show box or I can get down to a very specific frame by typing moving the slide bar to the exact location (or pausing at the exact time) and then copying the value shown at the top right into my box. Then simply adjust the Duration value to however long you want the subtitles to remain on the screen! It is defaulted to one, so just change it whatever you desire.To add another subtitle, you need to click the Add Subtitle button, which I have pointed out above with the red line. You can also click on the Edit menu and choose Insert Subtitle. In terms of modifying the look of the subtitle, there are not a whole lot of options. Basically, you can use bold, italic, underline and change the color. The actual encoding program that will insert the subtitles into the video will control the other settings for the look and feelOnce you have put all of your subtitles in, go ahead and click on File and then Save. In the Save as type box, scroll down to SubRip (.srt) and save the file in the same folder as the video file and give it the exact same name as the video also.
Use HandBrake to Encode Subtitles
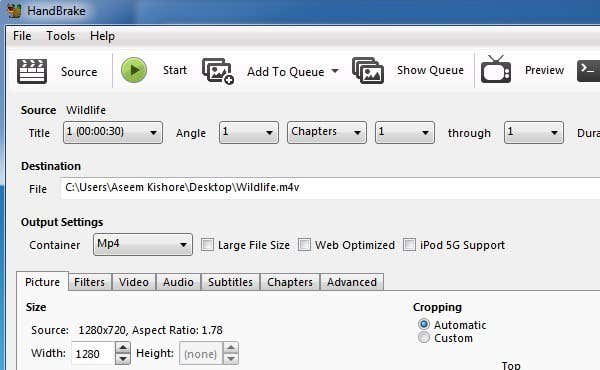
Once you open HandBrake, click the Source button and choose your video file. Go ahead and choose a destination for your output file and leave everything else as is. Make sure Normal is chosen in the Presets menu on the far right.Now click on the Subtitles tab at the bottom and click on the Import SRT button. Pick the SRT file and it will show up in the list box below.You can add more than one subtitle file if you need, i.e. for multiple languages. That’s about it for HandBrake! It’s a very simple process and works well.
Use TEncoder to Encode Subtitles
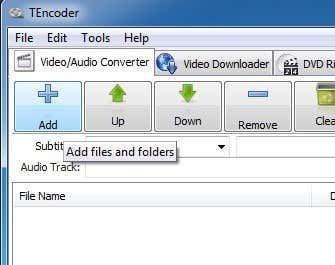
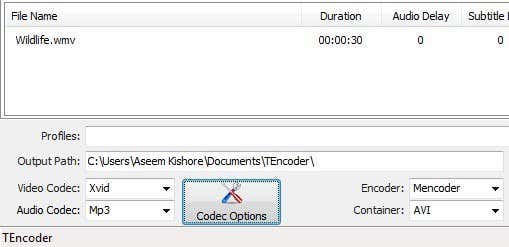
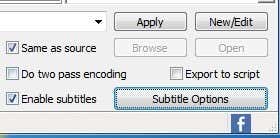
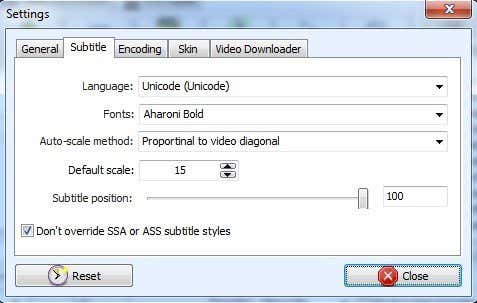
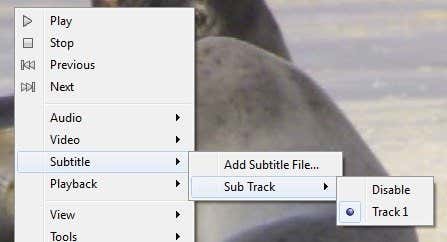
Now close out Subtitle Workshop and open up TEncoder. First, we have to add the video file that we want to add the subtitles to. Go ahead and click on the Add (+) button and choose your video file.Note that TEncoder is also a video/audio converter, so you can also change the format of the video file if you like. By default, it will create an AVI file using the Xvid video codec and MP3 audio codec. If you want everything to be the same as the original file, choose Direct Copy from the Video Codec dropdown box.Now make sure to check the Enable Subtitles box at the bottom right. You need to make sure that the subtitle file is in the same folder as the video file and that it has the same name also.If you want a higher quality file, go ahead and check the Do two pass encoding box. You can also click on Subtitle Options to configure a few more options for configuring the look and feel of the subtitles.Note that when you click on the name of the video file in the list, you should see the path to the subtitle file automatically populate in the text boxes above. At this point, you can be sure the subtitle file has been located properly. Go ahead and click the Encode button to start.If you check the Same as Source box, the newly created output file will be located in the same location as your original video file. You should now be able to play it in your media player and turn on subtitles to see them in action.It’s also worth noting that a lot of video players will either automatically find a subtitle or will let you choose one manually. This can be useful if you don’t plan on distributing the video, but just want to see the subtitles for a video while you watch a movie, etc. In my example, I’ll show you how this is done using VLC Media Player.First, open your video file and then right-click anywhere on the video, click on Subtitle and then click on Add Subtitle File. The program is smart enough to find it for you if you gave it the same name as the video file, in which case you’ll see that Sub Track is not greyed out and you should be able to pick a subtitle track.There are a few steps in the process and it can be a bit complicated and confusing at times, so if you have any questions or have gotten stuck, feel free to post a comment and we’ll try to help. Enjoy!
