There are a few methods to do this, from simple to advanced. You’ll learn every way to do it in this article.
Create a Drop Down List in Excel: Simple Method
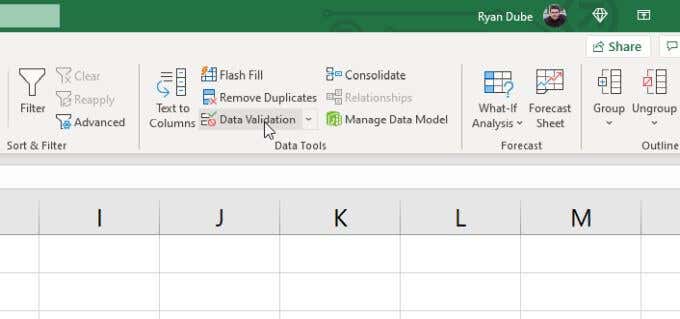
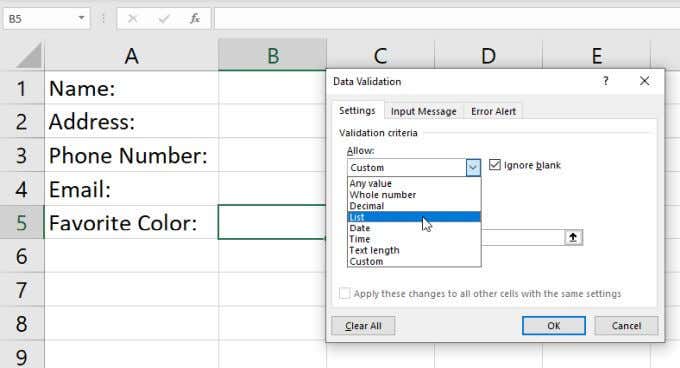
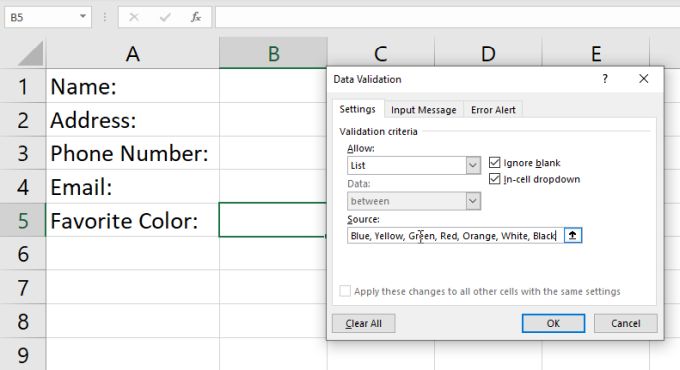
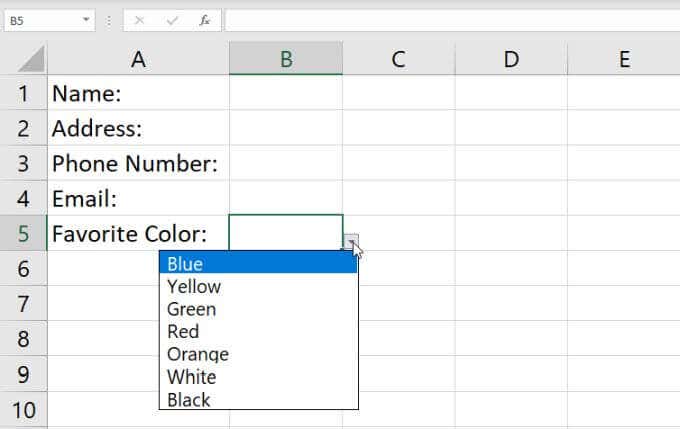
The easiest way to create a dropdown list in Excel is by entering the list manually. This is ideal for situations where you only need a dropdown list in a single cell and you don’t need to update it frequently.For example, if you’re sending people a file where you want them to fill out some fields, and one field has a simple list of choices, this method is ideal.To create a drop down list using the simple method:1. Select the cell or cells where you want to create your list.2. Select Data from the menu, and select Data Validation on the ribbon.3. This will open a Data Validation window. Select the dropdown list under Allow and select List.4. This allows you to type the items you want in your list manually. Just type each item into the Source field with each item separated by commas.5. Select OK. Now you’ll see that the cell you selected has a dropdown arrow next to it. When you select this arrow, you’ll see all of the items you typed out included in this list.While this is the fastest method to create a dropdown list in Excel, it’s also the hardest to maintain. Modifying the list requires going back into the validation settings and updating the Source field. If you create a lot of this kind of dropdown lists in Excel, it could take a lot of work modifying these. This is why it’s important to only use this method for single cells, and for lists that you don’t expect to change.
Create a Drop Down List in Excel: Using a Range
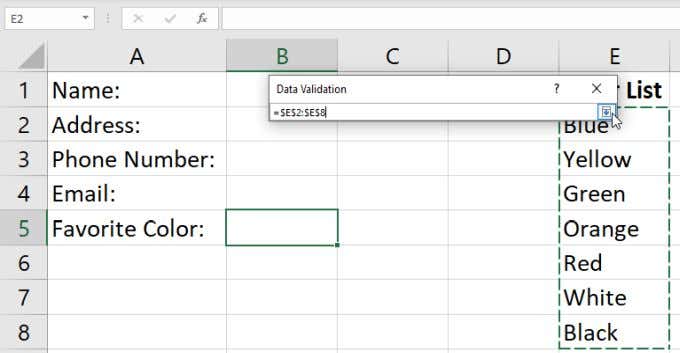
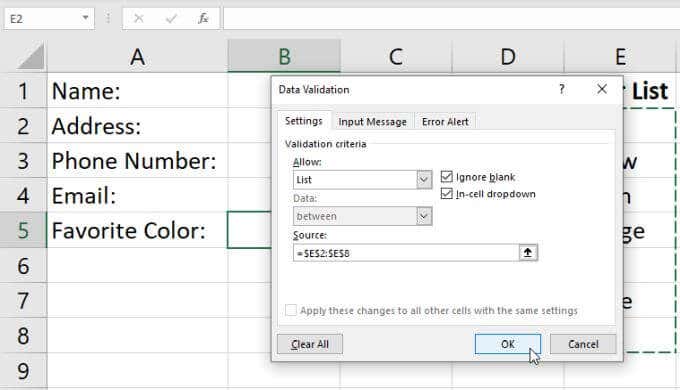
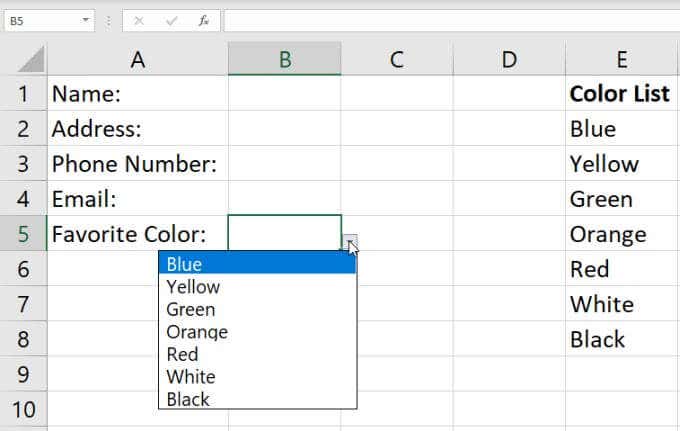
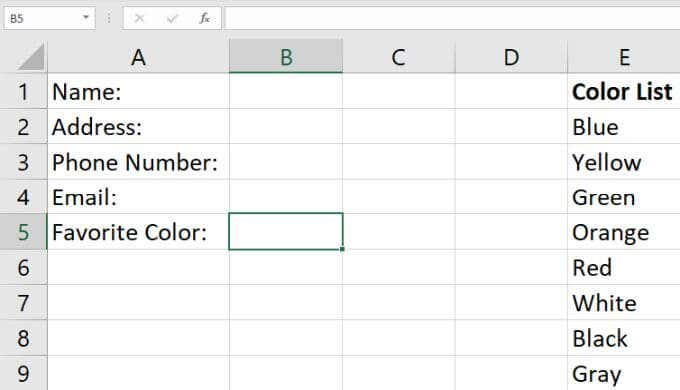
If you’d like a more flexible solution, you can pull items for your list from a range of other cells in Excel. To do this:1. First, list all of the items you want in your list into any column of cells. You can enter these on the current spreadsheet, or on any other sheet.2. Repeat the process above to select the cell and launch the Data Validation window. Set the Allow field to List. This time, instead of typing anything into the Source field, select the up arrow icon to the right of this field. This is the range selection option that lets you select the field where you want to pull your list items from.3. You’ll see the Data Validation window collapse so you can see the entire sheet. Drag the mouse pointer down the entire range of cells that include all of the list items you want to include. When you’re done doing this, select the down arrow icon to the right of the selection field. This will expand the Data Validation window again.4. You’ll see the range you selected now appears in the Source field. Just select OK to accept these settings. 5. Now, when you select the dropdown arrow to the right of the cell you’ve configured as a dropdown list, you’ll see all of the items included from the range you just selected.The nice thing about this approach is that you can change any of the items in that list just by modifying any cell in the range. Any change you make there will update every dropdown list you created where you selected this range as the source.This method is best when you want to format a lot of cells into a dropdown using the same list items. You can have the contents of a single range control the items for all of those lists, and it doesn’t matter how many there are.
Adding Items to Your List
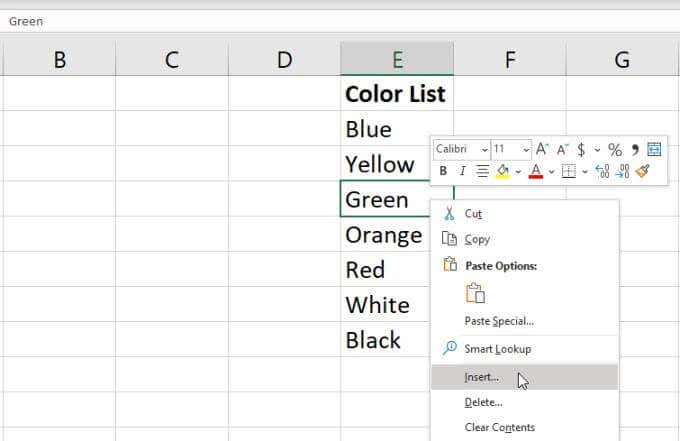
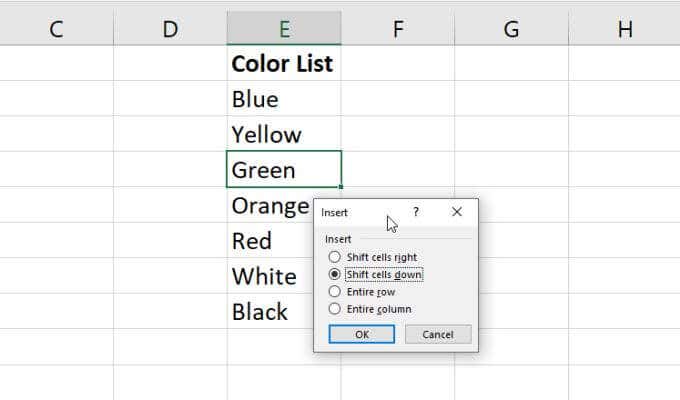
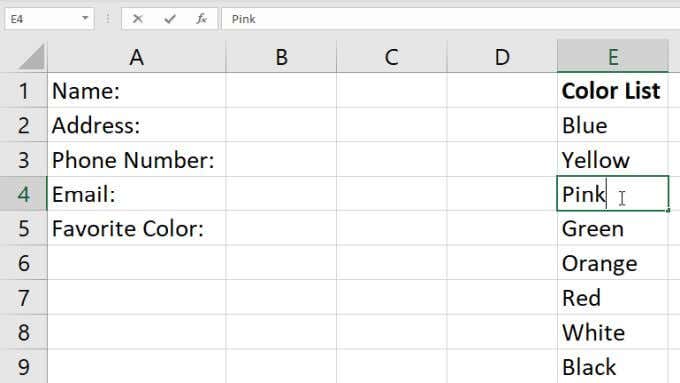
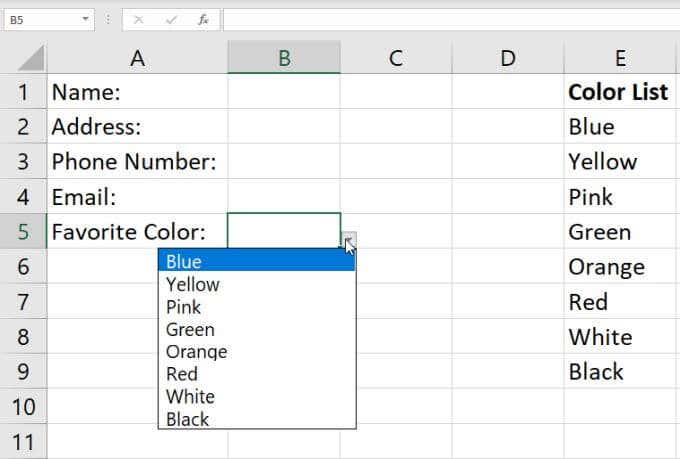
In addition to changing items in your range to update your lists, you can also add new items. You won’t be able to add an item to the end of the range, because your range selection is limited by the first and last cells you’ve selected.Instead, you’ll need to insert a new entry somewhere in the middle of the range. Excel will dynamically update your range selection in the data validation settings to include the new range that you’ve increased by one cell.To do this:1. Right-click any cell in your source range, and select Insert from the dropdown menu.2. In the small selection window, select Shift cells down, and select OK. This will shift all cells in the range down by one, inserting a blank cell where you’ve selected.3. Type the new item you want to add into the empty cell you’ve just created.Now, when you select the down arrow icon to the right of the dropdown list cell you created, you’ll see the new item you just added in the range.This is an easy way to add new items to your dropdown list, but it does require a few extra steps. It certainly isn’t anywhere as simple as just adding a new item to the end of your range. If you would like to do that, you’ll just need to change how you’ve configured the data validation to your range. You can learn how to do this in the next section.
Dynamically Adding Items to Your List
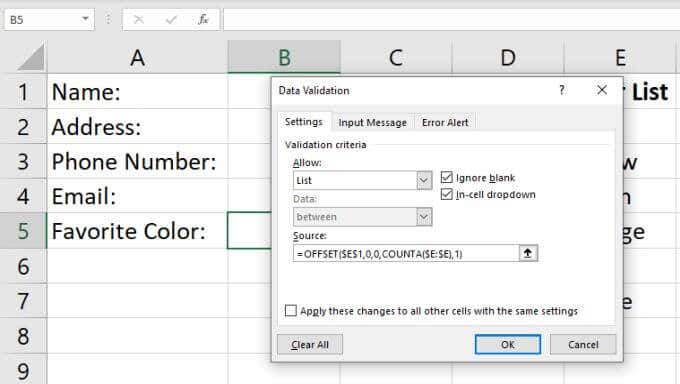
For a more convenient way to add items to your dropdown list just by typing the new item at the end of your configured range, you’ll need to use the OFFSET function.With the dropdown list cell selected, select Data from the menu and Data Validation from the ribbon.In the Data Validation window, change the Source to the following:=OFFSET($E$1,0,0,COUNTA($E:$E),1)Change $E$1 and $E:$E in the formula to use the letter of the column where you’ve entered your list of items. Select OK to confirm this new Data Validation configuration.Here’s how the formula works:
The 0 arguments in the OFFSET function tell it not to apply any offset to columns or rows.The output of the COUNTA function tells the OFFSET function the height of the range.The COUNTA function counts the number of cells that aren’t empty in the column that contains your range.
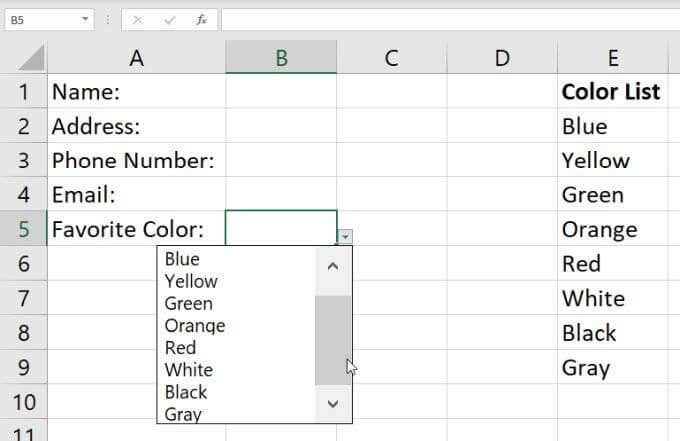
Now, whenever you add a new value to that column, the height parameter of the OFFSET function increases by one, and the OFFSET function returns the entire range, updated to include your new entry.To see this in action, just add a new entry to your range of items. Select the dropdown arrow to the right of your dropdown cell, and you’ll see your new entry appear in the dropdown list.Keep in mind that you may need to use the scroll bar on the right if your list of items is long.
Removing a Drop Down List in Excel
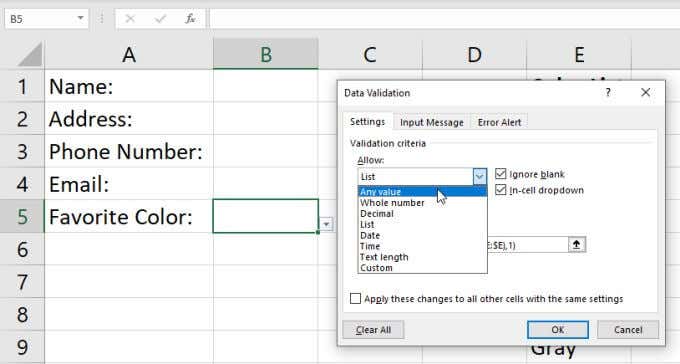
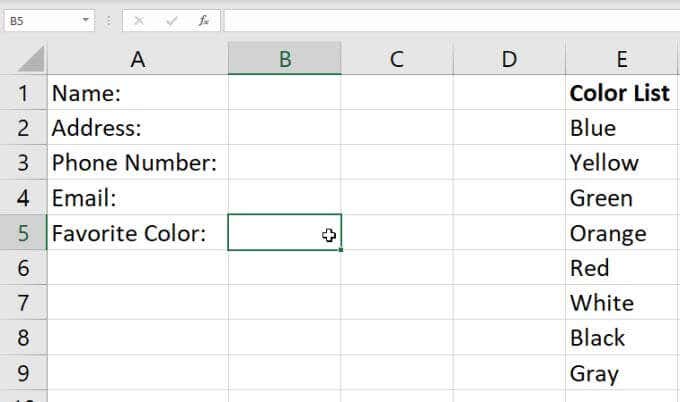
Finally, if you ever want to remove the dropdown option from any of the cells where you’ve set this up, just select that cell and open the Data Validation window again.Change the Allow dropdown to Any value and select OK. Once you change this setting, you’ll see that the cell will turn back to normal.
Creating Drop Down Lists in Excel
Creating a dropdown list in Excel is easy, and you have plenty of options to choose from. The method you choose just depends on how many cells you plan to enable with one list of items, and how flexible you’d like the list of items to be. If you plan to change the list items frequently, then definitely use the dynamic approach.
![]()
