By the time we’ve finished this guide, hopefully you’ll know everything there is to know about creating thumbnails on YouTube.
Free Image Editing Software for Thumbnails
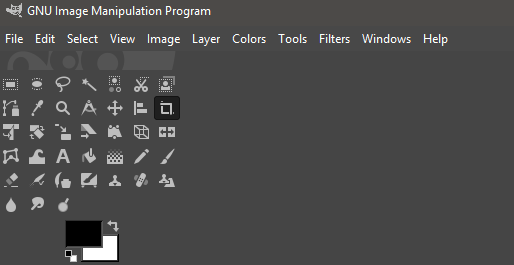
To start with, you’ll need to download free image editing software. We would suggest using GIMP – the GNU image manipulation program. It’s free, open source, and our tutorial will be based on using GIMP, so you can follow along. Download GIMP here.Once you have downloaded GIMP, open the installer and go through the installation process. Once installed, open GIMP and you’ll be greeted with something a little like the image shown above.
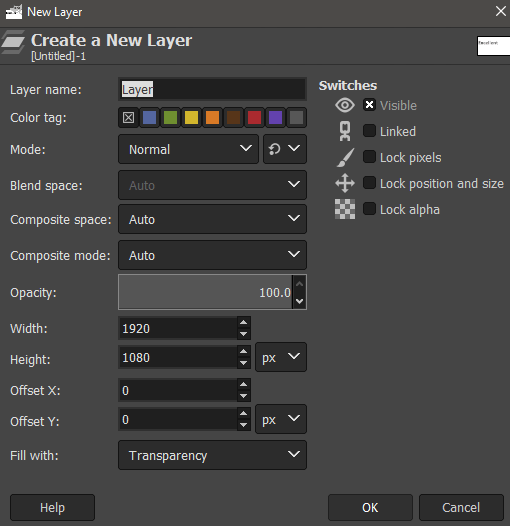
Click FileClick NewA new window will openInput 1920 into WidthInput 1080 into HeightClick OK
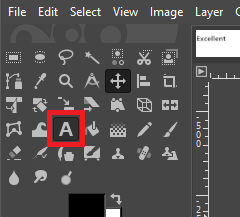
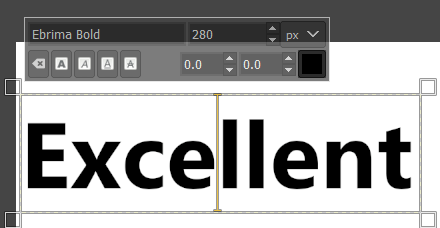
You will now have a blank canvas to work with. This will be the beginning of your YouTube thumbnail. Next, it’s time to add some text. If you watch YouTube, you’ll know that text is one of the most important parts to draw interested viewers in. The most successful YouTube thumbnails have the majority of the image dedicated to text.The key here is to use words that will draw in your users or intrigue them. This depends on the topic itself, but if you can think of a good title, you can often just include the beginning of the title. To do this, first click the text tool in the top left. Next, on your blank canvas, click to start typing. You can use the floating toolbar to adjust the text size and the box on the left to change font. There are many fonts to choose from by default, but Ebrima Bold is a good starting point. It’s clear, eye-catching, but doesn’t lean too far towards either being over the top or too toned down and boring.We would suggest typing the first line of text. Later, you can repeat the following steps with a new line of text, if needed. Now that you have some text, it’s time to add some detail to it to help it stand out.Before that, though, we need to choose a background color or image that compliments the text. Usually, a nice backdrop with toned down colors can work. For this, we’ll just take a backdrop of a mountain by searching for a mountain image on a royalty free image website like Pexels or Pixabay. For your image, try something relevant to the video.
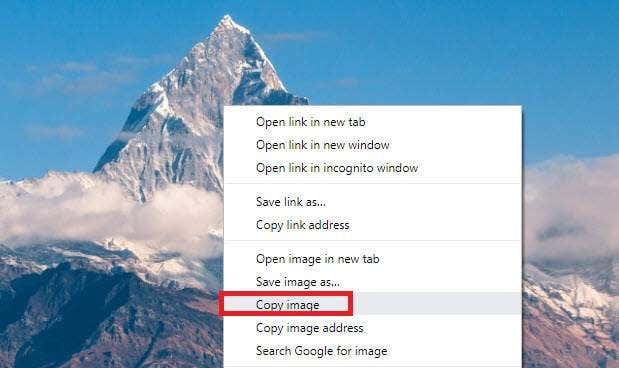
Right click your image found on Google, and click Copy Image.Go back to GIMP and then press Shift+Ctrl+N to create a new layer.Keep the default settings and click OK.
Next, press Ctrl+V to paste your image onto the newly created layer in GIMP.In the top tab, click Layer, then click To New Layer.After, pay attention to the panel in the bottom right. This is your layer panel.Click and drag your image layer right to the bottom, just above ‘background’.
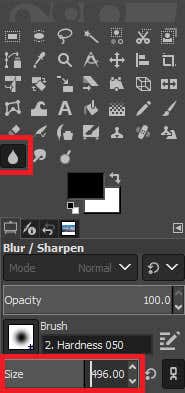
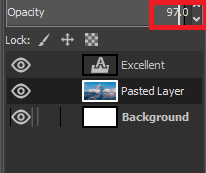
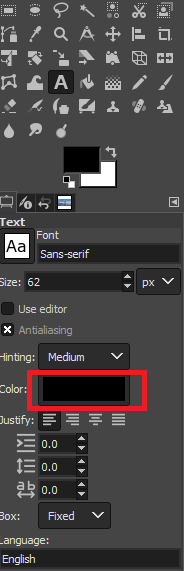
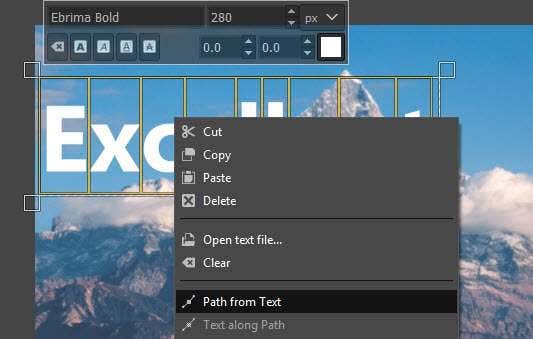
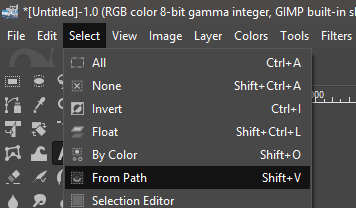
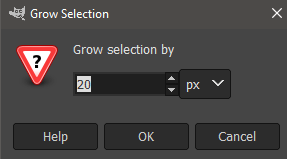
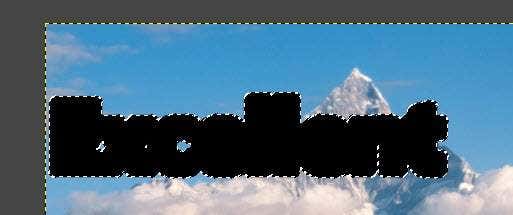
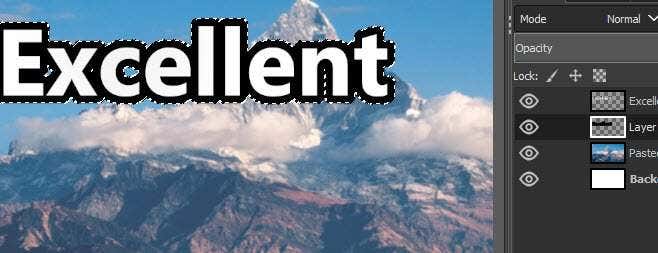
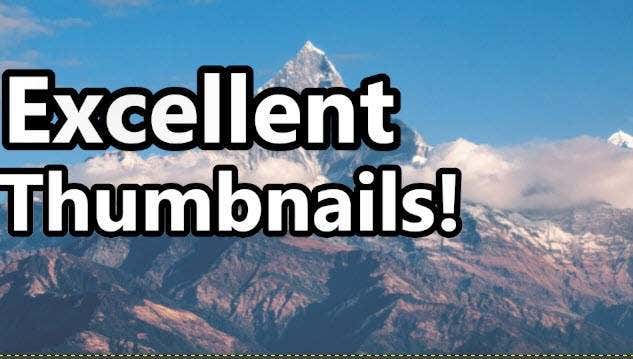
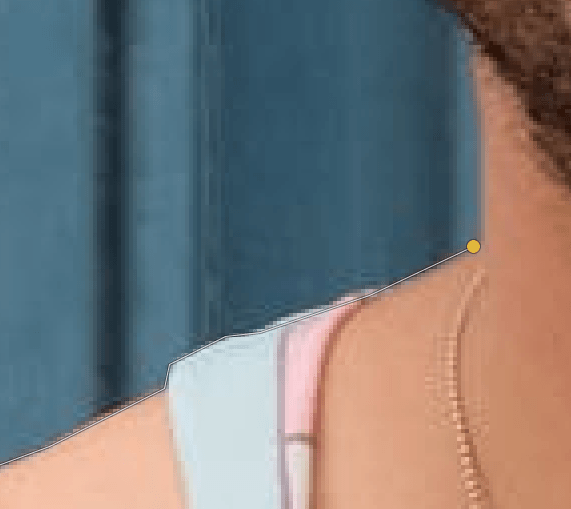
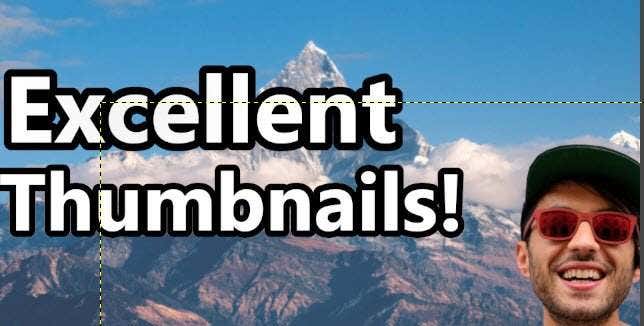
After, you should have your image layer just below your text layer, like shown above. We don’t want this background distracting viewers from the text, so click the blur tool from the box in the top left.Once you have the blur tool, increase its size to about 400, then start clicking and dragging on your background image. This will blur the image and help to keep it from being too distracting.If your background is still drawing too much attention away from your text, you can adjust the opacity slightly in the layer box at the bottom right. Double click the number on the opacity bar and adjust it 2-5%.Once that is done, your background image will be ready, and it’s now time to focus on the text.If you’d like to, you can adjust the text color and other attributes by clicking on the text tool, selecting your previously written text, and using the tools that appear on the left side of the screen.If you don’t want to go over the top, white is often an excellent choice. Next, it’s time to add a background to your text. This helps the text to stand out even further. To do this, first click on the text tool again in the top left, then double click your text to select it. After that, right click, and click Path from Text.After that, click Select in the toolbar at the top, and then click From Path.When you do this, your text will have an outline to indicate that it has been selected. Next, click Layer in the top and click New Layer. After click Select in the toolbar at the top again and click Grow.A new window will appear. Choose 20 px under Grow selection by’. Finally, get the bucket tool in the box in the top left and choose a color. Black is often a good choice. Click to fill in the selected area. You should end up with something that looks like this. After following these steps, you can bring the black background layer under the text layer by dragging it in the layer box in the bottom right. You will now have completed the steps necessary to make text that stands out. You can repeat these steps for a new line of text. After doing this with a new line of text, here is what we have created. It’s still missing something, though. To finish it off with a final touch, we would suggest adding a point of interest to the bottom right corner of the thumbnail. If you are able, a good image of your face will be perfect, but if it doesn’t suit the video, you could take a good shot of whatever product or item you may be discussing in your video. Or, even just grabbing a stock photo image can work. For this example, we went to Pexels and found an ecstatic man, then right clicked it, copied it, and pasted it onto a new layer on GIMP, just like with the mountain.Once you’ve done this, you may need to cut out the background, so follow the steps below.Click the Free select tool lasso in the toolbox at the top left. Click to create points around the outline of the area you’d like to keep. If you need to be more precise zoom in and out with ctrl+mouse wheel up/down.This process can take some time, but just be patient. You’ll get the hang of it after a while. Make sure the start point connects with the end point by clicking. Once you’ve finished, go to the Select option in the top toolbar and click By Color. After, click Select again and click Invert. Finally, press Ctrl+X.This is what you should see with your finished image. With some tweaking you can make the text grab the attention of those that would be interested in your video and choose a backdrop and supporting image that are more relevant to what the video is about.
Summary
I hope that you’ve found this guide on making YouTube thumbnails useful. If you’d like any more advice, please leave a comment below and I’ll get back to you when I can.