Imagine you had a presentation with two dozen slides. To change one tiny element, you would have to move through all the slides making the changes one at a time. But what if you could change just one slide and have it applied automatically to all the remaining ones?
Make Formatting Easier With A Slide Master
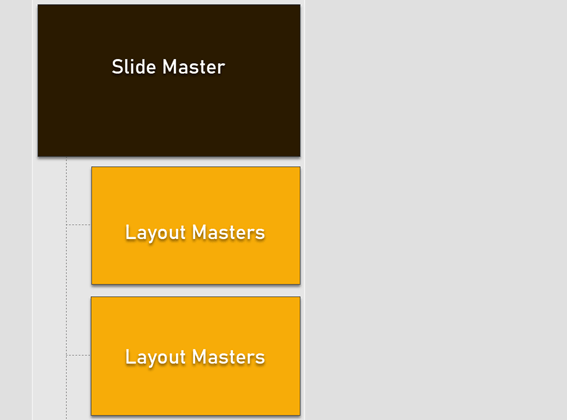
Slide masters are like special templates but just more overarching. As the name suggests, it is the topmost slide in the deck that contains all the information about the theme, layouts, colors, and fonts that you want to have in all the slides.You can use multiple slide masters in one presentation. Each will be responsible for a group of slides and their unique layout under it. The hierarchy looks like this:Now that you have an idea of slide masters, let’s take a deeper dive into them. The instructions below apply to the slide master in Microsoft PowerPoint 2016, 2019, and Microsoft 365.
How To Open Slide Master In PowerPoint
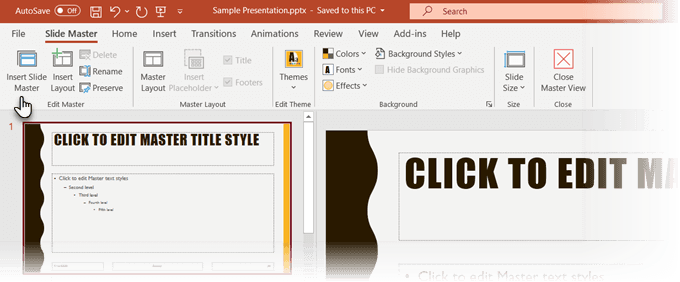
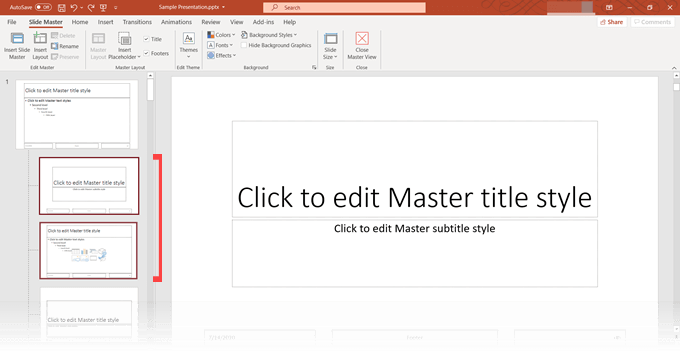
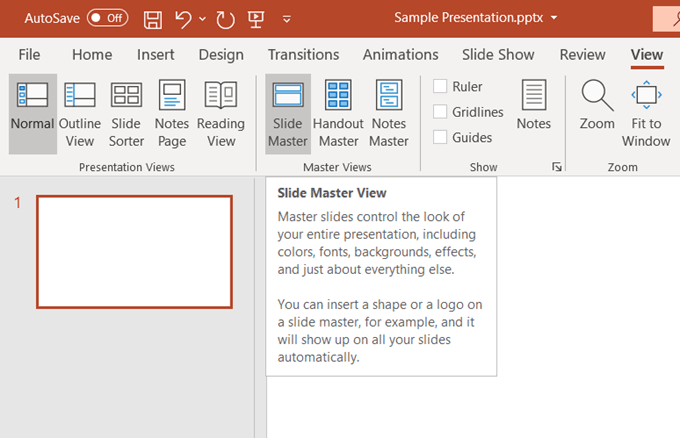
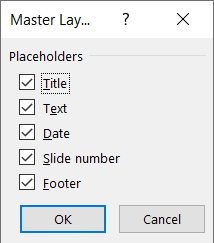
The Slide Master has its own tab on the Ribbon. To view the Slide Master, go to View > Slide Master.The Slide Master tab in PowerPoint has all the tools you need to control the formatting.The left pane displays the slide layout for your presentation. The Slide Master is the topmost slide in the hierarchy and looks like the blank content slide you get when you start a fresh presentation.The controls are organized into specific groups with obvious functions:Edit Master: Use this group to edit the Slide Master. You can add another master slide with the Insert Slide Master button, or you can use the Insert Layout button to add a new layout under an existing Master.The Preserve button ensures that PowerPoint does not delete the Slide Master if it’s not in use. Select the slide, then click Preserve. A pushpin icon next to the master slide shows that it is now preserved.Master Layout: Use this group to add or remove elements like the title, and footers. by adding or removing placeholders, the title, and PowerPoint footers.Edit Theme: The controls in this group let you apply a pre-built theme or use a custom theme with the master slides.Background: Set the background for the Slide Masters or the Layout Masters.Size: Select the slide size and the orientation according to the requirements of your presentation.In the following sections we will see how to make changes to a slide master that will automatically reflect on the slides that follow it.
What Are Layout Masters?
Of course, some slides can differ in their layouts from one another. Some of your slides will be designed for images, some for text, while some can have animation. These are controlled by another type of thematic slide called the Layout Master. These are subordinate to the Master Slide. And every Master Slide can have several Layout Masters. For instance, the Title layout is a type of Layout Master.You can use one Layout Master for all slides that display text. Another for images… and so on. Change an element in one layout master slide and all dependent slides will change with it. You don’t have to mess with each slide. Working on designing a Layout Master slide is similar to modifying a PowerPoint template.Thus, the Slide Master and Layout Masters in PowerPoint can not only help you build your presentations quickly but update it in the future too. Anyone else in your team can come in and make changes without going back and forth between the slides. A library of pre-built designs can also help you change the layout of a plain presentation with only a few clicks.
Format A Presentation Using Slide Masters
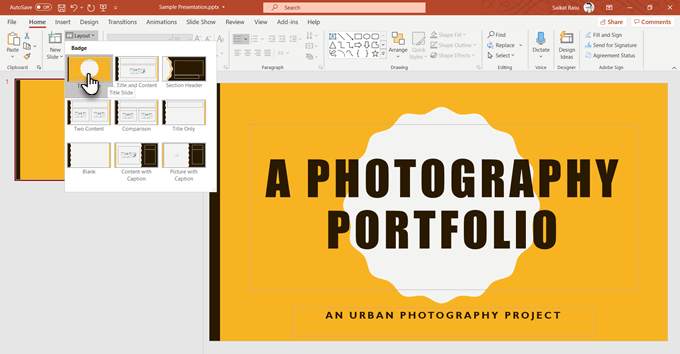
The slide master as we have seen has a default layout. You can use that or start from scratch with your own design.1. Go to the Slide Master View.From the View tab on the Ribbon, click the Slide Master button in the Master Views group.2. The Slide Master tab on the Ribbon.The Slide Master tab on the Ribbon is displayed. A new Slide Master appears with PowerPoint’s default layout.3. Modify the Slide MasterThe Slide Master has default placeholders for the title slide, sub-headings, footer, date, and more. Make any formatting changes you want to this plain slide. You can also pick from PowerPoint’s available themes to design the Slide Master.To choose the elements in the Slide Master, you can also click on Master Layout and then uncheck the place holders you do not want. 4. Modify the Layout MastersEvery theme has several slide layouts. Choose the layouts to match your slide content. Some are better for text, some for comparisons, and some are better for graphics. You can design your own custom layouts from scratch by clicking on Insert Layout from the Edit Master group.Like a default layout but want to tweak it slightly? Right click on the said layout slide thumbnail on the left and choose Duplicate Layout. Also, delete the layout masters that you don’t need with the right-click shortcut or the Delete button on the tab. PowerPoint offers around 25 layouts to choose from and you may not need them all.5. Apply the LayoutsClick the Close Master View button on the Slide Master tab on the Ribbon to return to Normal View. In the thumbnail pane, click the slide that you want to reapply the updated layout to. Go to the Home tab > Slides group > Click Layout. Select the layout that you created in Slide Master View. You can also select multiple slide thumbnails and apply a common layout to them.Most of your presentation will be controlled by the layout masters. Just remember to re-apply the layouts to the relevant slides if you go back and change something in the layout masters.
Make Your Masters Before You Start On Your Slides
HTML documents have style sheets. Word documents have styles. And, PowerPoint has Slide Masters. These are printing blocks that make anything that comes after they are made a lot easier. A PowerPoint design can be refurbished and made spanking new with a few tweaks to the master slides. You just saved a lot of time with the master slides. Put that time to better use to work on the actual content and make your PowerPoint more engaging to the audience.

