I didn’t go into much detail about the apps in that post since it was focused on catching unauthorized users on your network. In this article, I’ll talk in more detail about these two apps that can be used on Apple or Android devices and I’ll also mention desktop apps that you can run on Windows and Mac OS X.These network scanning tools allow you to not only see all the devices on your network and their IP addresses, but also view folders shares, open TCP/UDP ports, hardware MAC addresses and more. So why would you care about this information?Though it’s a bit technical, the information can help you make your network more secure. For example, you may find folders that are being shared on your network by accident. Anyone who connects to your network via cable or wireless could then easily search for shared folders and copy that data to their computer.When looking at open ports for a computer or device, you can easily see whether remote desktop is enabled, whether an FTP or HTTP server is running and whether file sharing is enabled or not. If you never connect to your computer remotely, then having remote desktop enabled is just a security risk.
Windows Network Scanner
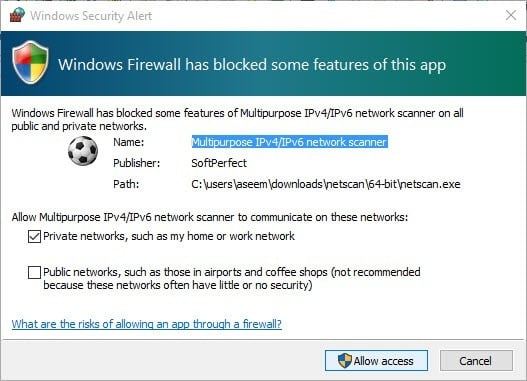
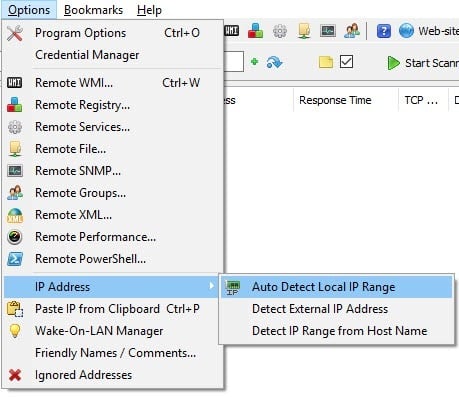
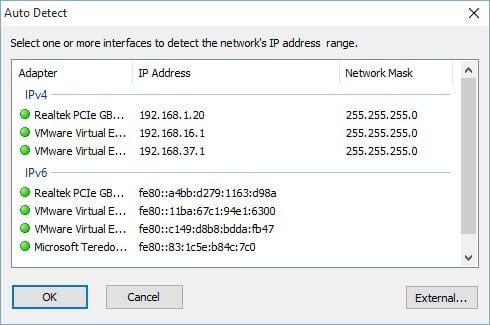
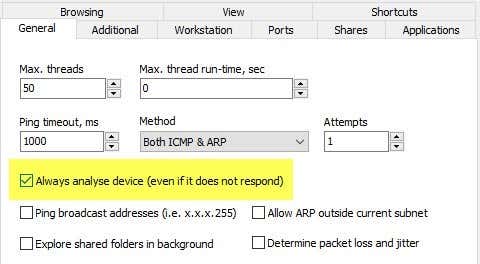
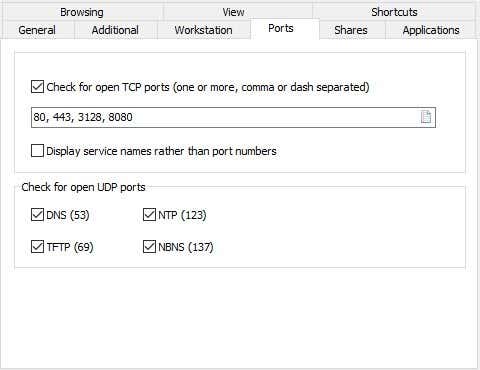
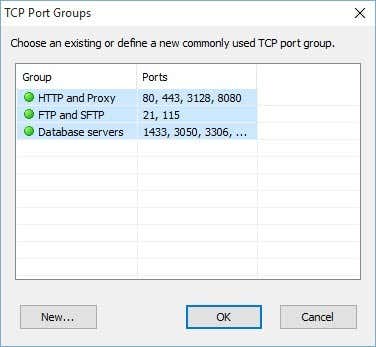
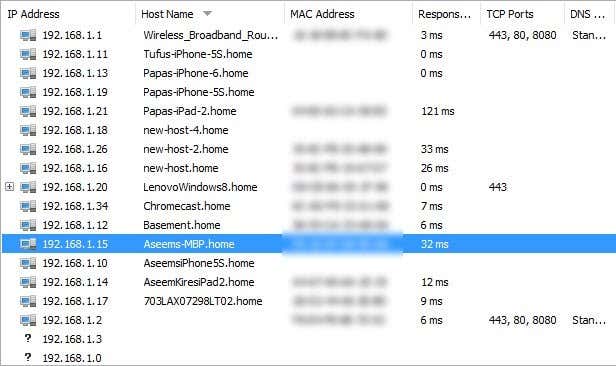
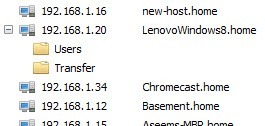
Let’s start off with a free tool for Windows PCs called SoftPerfect Network Scanner. I like this tool because it’s updated often, runs on Windows 10 and has a 32-bit and 64-bit version. The program also doesn’t require any installation, which means you can carry it on a USB stick or save it to Dropbox and use it on any computer you want.When you run the executable file for your version of Windows (determine if you have 32-bit or 64-bit Windows), you might see a message saying that Windows Firewall has blocked the program. Make sure Private networks is checked and then click on Allow access.Once the program loads, you’ll need to enter your network starting and ending IP address range. If you don’t know this, don’t worry. Just click on Options, IP Address and then click on Auto Detect Local IP Range.You’ll get a popup window with the detected IP addresses for IPv4 and IPv6 on any network cards you have installed, including virtual ones. For most home users, you’re only going to see one item listed under both IPv4 and IPv6. Unless you have IPv6 setup, you should click on the network card listed under IPv4.Now you’ll be brought to the main interface again, but now the IP address range will be filled in. You’ll see the Start Scanning button at the right, which you can click to start a scan.However, you should first set the scanning options before performing a scan. Click on Options and then Program Options. On the General tab, the only option you may want to check is Always analyze device. By default, the scanning program will only show you devices that respond to certain requests, so the final list may not show all the devices that are actually on your network because some devices simply do not respond.The scan does take quite a bit longer (several minutes compared to several seconds), but it’s worth it if you really want to see every device on your network. The Additional and Workstation tabs are really only useful for corporate environments where you have many machines on the same network and you want to get information about each computer. The Ports tab is where we can to go next.Check the Check for open TCP ports box and then click on the little paper icon at the far right of the text box. This will open another window that lists out some TCP port groups. You want to click on HTTP and Proxy and then press the SHIFT key and click on Database servers to select all three items.Back on the main screen, you should see all the port numbers listed in the text box. Go ahead and also check all the boxes for open UDP ports. At this point, click OK to go back to the main program screen. Now click Start Scanning and you should see results slowly added to the list.In my tests, the program was able to find 16 devices on the network when checking the Always analyze device option compared to just 11 items when not checked. Any item with a plus sign to the left of the IP address means that it has shared folders. You can click on the + sign to see the shared folders.The Host Name column should give you an easy to understand name for the device. On the right, you’ll see a column called TCP Ports, which will list out all the open ports for that device. Obviously, the numbers don’t make much sense unless you know what they means, so check out this Wikipedia page that describes each port number in detail.If anything has port 80 (HTTP) listed, that usually means it has some kind of web interface and you can try connecting to it via your browser by simply typing in the IP address. Port 443 is for secure HTTP (HTTPS), which means you can connect to it securely also.
Mac Network Scanner
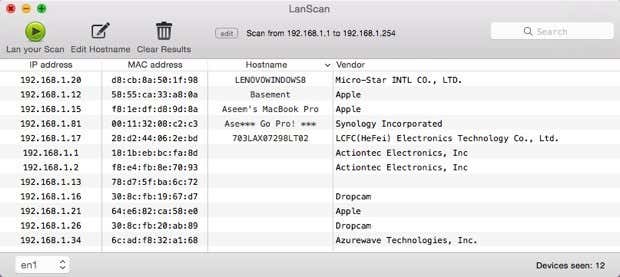
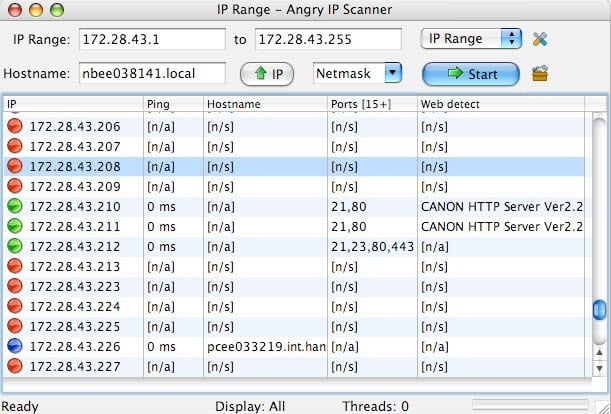
On the Mac, you have a couple of options. LanScan is a free app on the Mac Store that does a very simple scan and displays the IP address, MAC address, Hostname and Vendor. The free version will only list the first four hostnames fully and the rest will only show the first three characters. A little annoying, but probably not a huge deal on most home networks.You’ll also notice that it only found 12 items and that’s because it doesn’t have any options to scan each IP address regardless of whether it responds or not. A better network scanner for the Mac is Angry IP Scanner shown below. It’s open source and works on Windows, Mac and Linux.By default, the program also scans open ports, which LanScan does not do. The only issue with this program is that you have to have Java installed in order to run the program. Java is a big security risk and is disabled on most Macs by default, so you would have to enable it manually.
Smartphone Apps
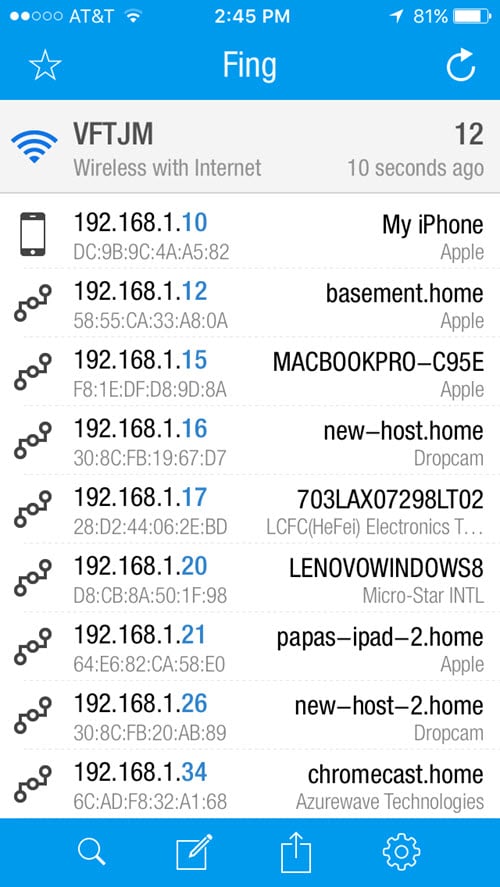
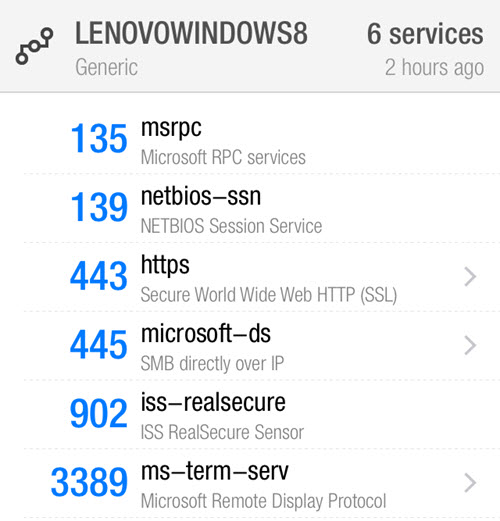
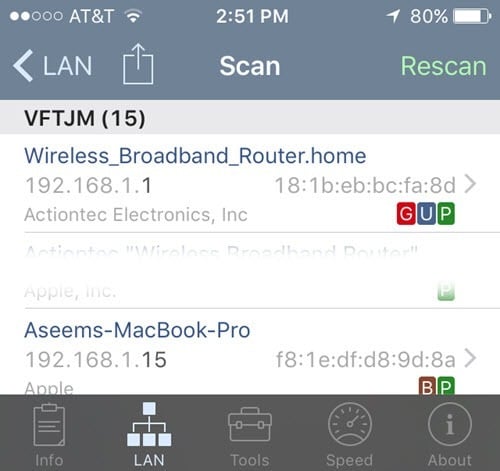
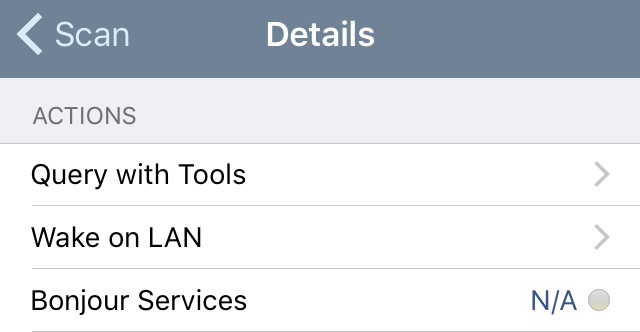
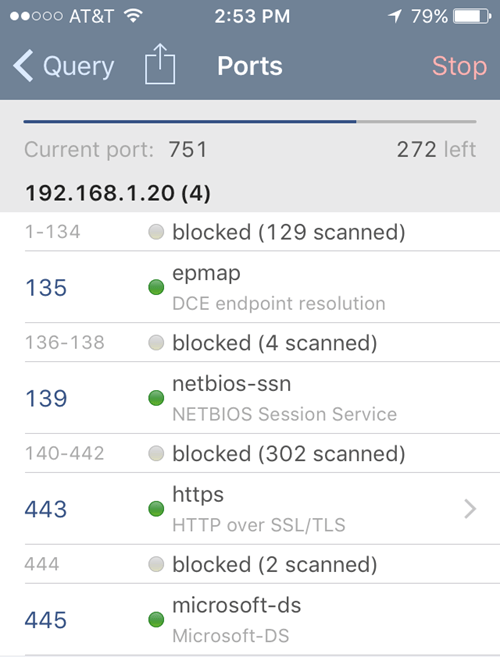
I have two apps that I use, both of which are free, and one that can you download on Apple devices or Android devices. Both apps are excellent and pretty much give you the same info, but each has its pluses and minuses.Fing is a free app that is available on the Google Play store and the iTunes store and has a great looking interface. You don’t have to worry about entering any IP address range with these apps because they figure it out on their own. Once you start a scan with Fing, you’ll get a nice looking list of devices with some basic info like hostname, MAC address, IP address etc.If you tap on a device, you’ll get another screen where you can give the device a custom name (a feature I really like), enter a location and even add additional notes. If you scroll down, you’ll see an option called Services, which lets you see scan the device for open ports.The only downside I have seen with this app is that it doesn’t list out all the devices on the network. It only caught about 12 devices on my network out of the 16 that the Windows program had found.The second app I like using is Net Analyzer, available from the App Store for free. You run a scan by tapping the Scan button at the top right and you’ll get a list of all your devices within a few seconds.Using this app, I got 15 devices, which was pretty close to the total number of devices on the network. With Net Analyzer, you’ll also see some colored letters on devices that have certain services enabled. The green P means it is pingable, the brown B means Bonjour services are available (Apple devices), the red G means it’s a gateway device (router, etc), and a blue U means UPNP and DLNA services are available.You can tap on a device to get more information and perform queries on the device. Tap the Query with Tools option shown below once you tap on a particular device.On the next screen, you’ll see several options including Ping, Route, Ports, Whois and DNS. Tap on Ports, choose Common or All and then tap Start at the top.As the scan progresses, you’ll see the ports that are open and active and also which ports are blocked. The app also has other tools that you can use to scan specific devices on the network to get more information.Hopefully, these tools will allow you to fully see what devices are on your network and what services and ports are open. If you have any questions, feel free to post a comment. Enjoy!
