Outlook lets you create custom replies to be automatically sent to anyone who emails you. You can also specify a custom date period during which the app should handle your emails for you.
Set Out Of Office Outlook Replies For Exchange Accounts
If you’re in a business environment and your company or organization uses Microsoft Exchange, you have a really easy way to set out of office replies in Outlook for your email account.
Launch the Outlook app on your computer.Click on the tab that says File at the top and you’ll see various options. Click on the option that reads Automatic Replies (Out of Office). If you don’t see this option, skip to the next section to learn how to do the task.
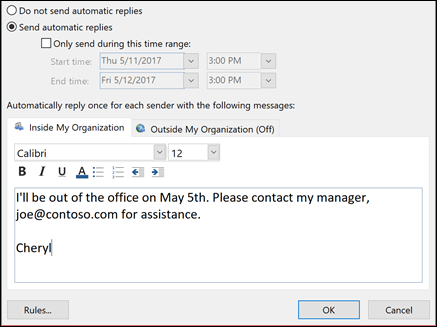
A box will appear on your screen letting you input information in various fields. To send out automatic custom replies, you’re going to need to fill-in the fields as the following.Enable the box that says Send automatic replies at the top.Tick-mark the Only send during this time range box. Then select the from and to dates when you won’t be available to respond to your emails.If you want your reply to be only sent to those who are in your organization, click on the Inside My Organization tab. Otherwise, click on the other tab that says Outside My Organization.Type in the response you want to automatically send in the box given on your screen. You can use the formatting tools as well to format and change the style of your text.Once you’re done, click on OK to save the changes.
Outlook will now auto-send your predefined custom message to anyone who sends you an email during your specified date period.
Set Out Of Office Replies in Outlook For IMAP/POP3 Accounts
Most general users out there use IMAP or POP3 accounts in their Outlook. This usually includes using your Hotmail, Gmail, and such other email accounts with the Outlook app. If you’re one of these users, you’ll need to create a rule to send out automatic replies as the above method won’t work for you.Fortunately, though, creating a custom message and a rule to automate sending the replies isn’t too difficult in Outlook.
Create An Automatic Reply Template
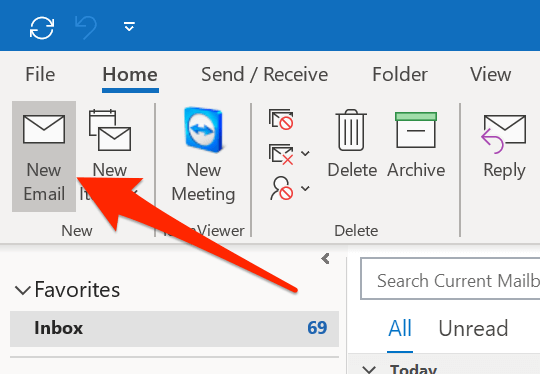
Open Outlook on your computer and click on the New Email option at the top.
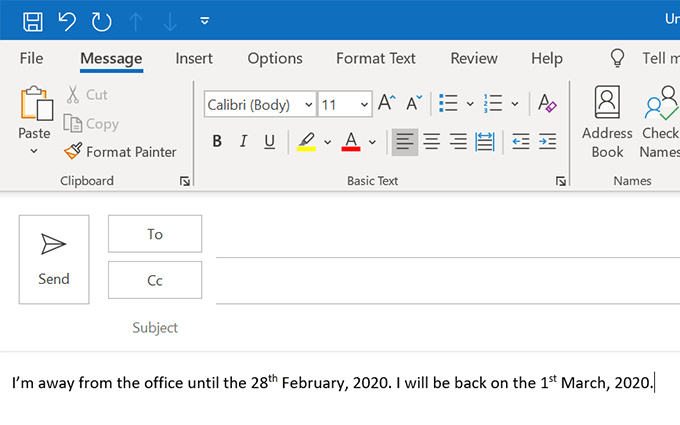
The usual email compose window will open. Here, you need to type in the email that you want Outlook to automatically send. Just type in the body of the email which usually includes mentioning how long you won’t be available and when you’ll be back.
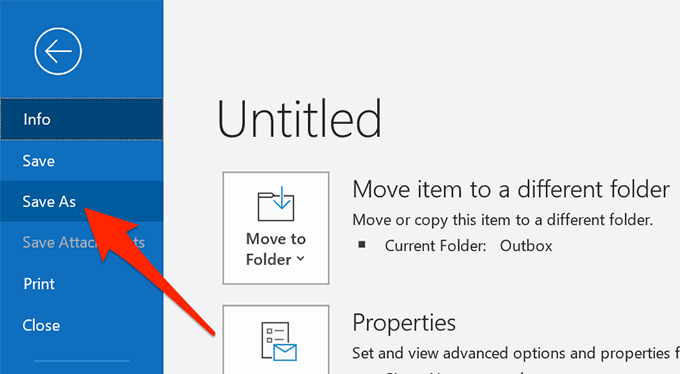
Click on the File tab at the top and select Save As.
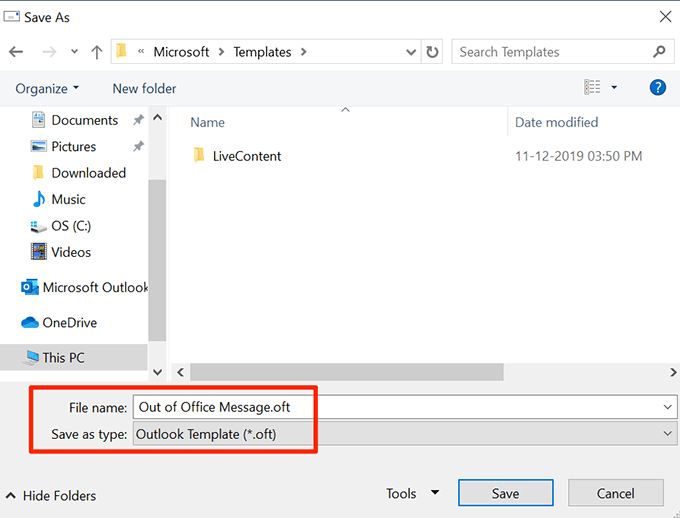
Enter a name for your out of office reply template and choose Outlook Template from the Save as type dropdown menu. Then click on Save.
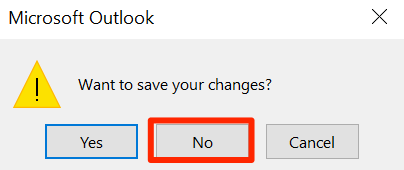
Close the email compose window and select No when it asks if you want to save the changes.
Set Up An Auto-Reply Rule
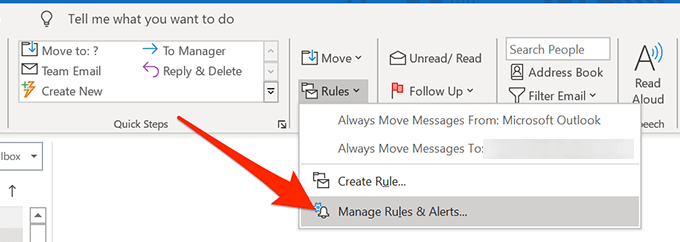
Click on the Home tab, select Rules, and choose Manage Rules & Alerts.
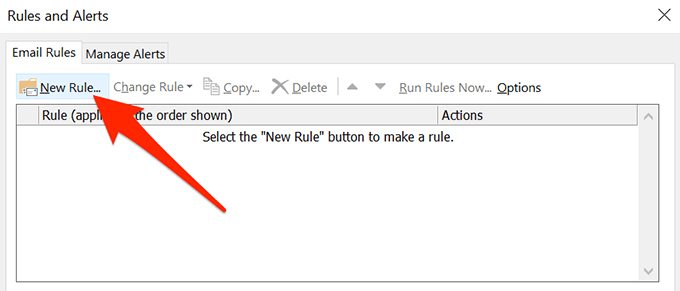
In the Email Rules tab, click on New Rule to create a new rule.
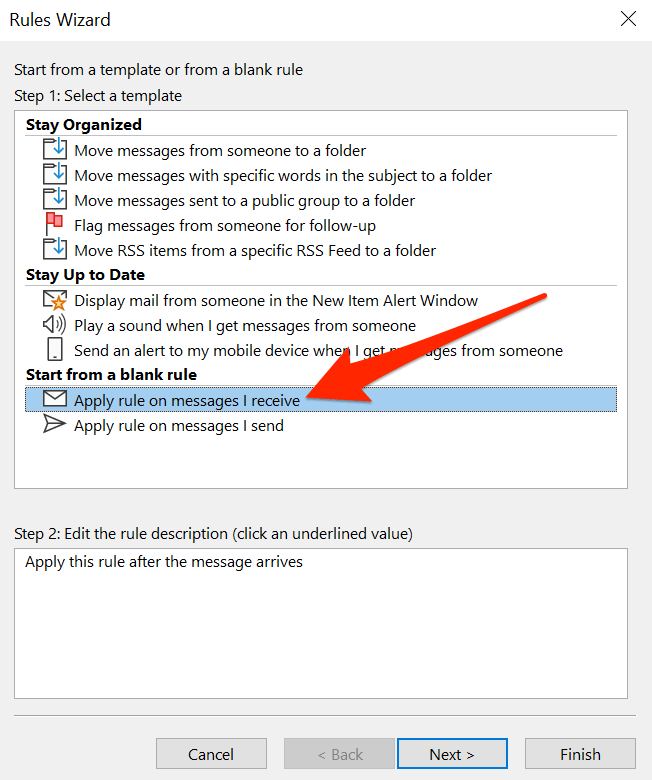
Select Apply rule on messages I receive and hit Next.
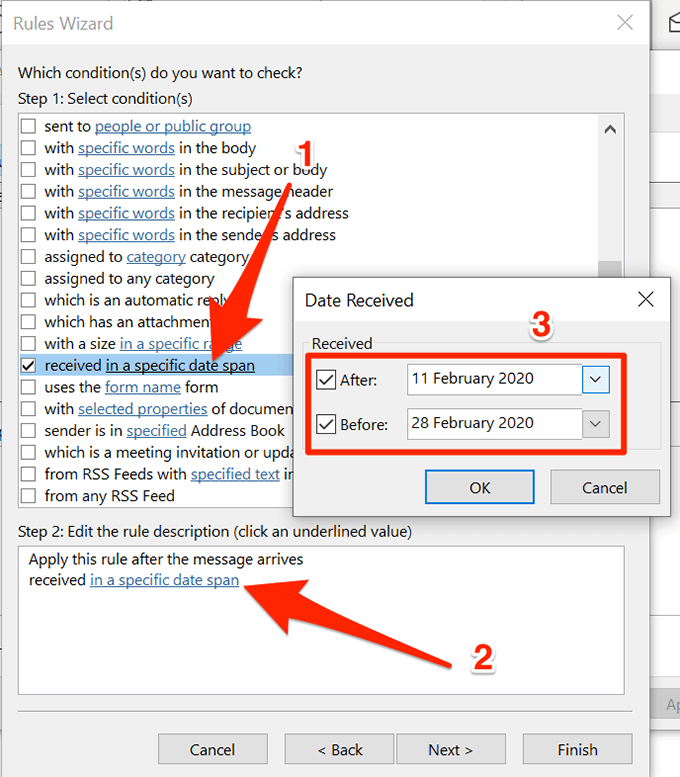
Select the received in a specific date span condition and click on its link in the large white box.Checkmark both After and Before checkboxes and specify the date range in which you won’t be able to respond to your emails. Then hit OK followed by Next.
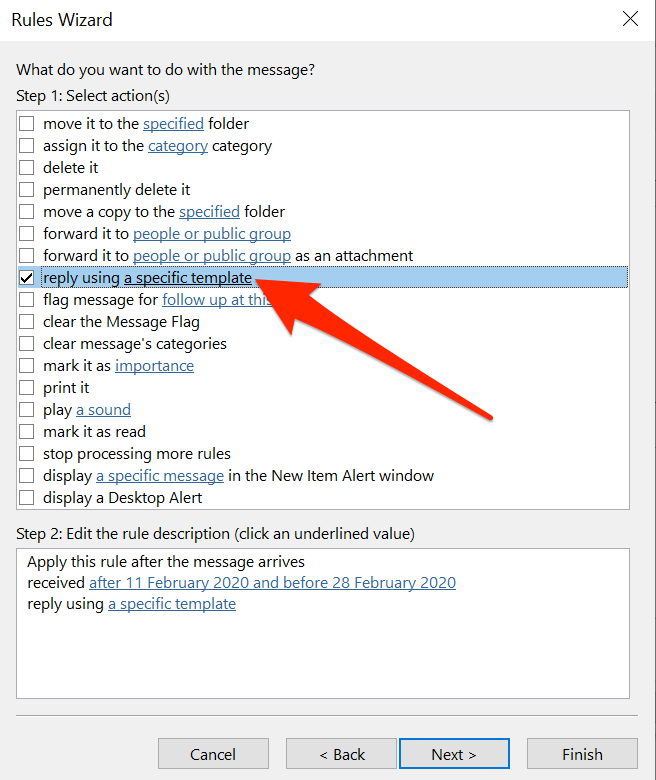
Checkmark reply using a specific template and click on its link.
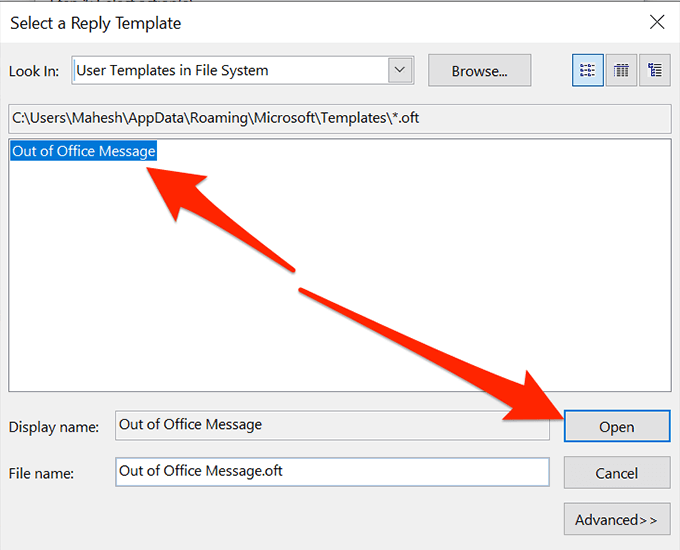
Select the email template you created earlier, click on Open, and then hit Next.
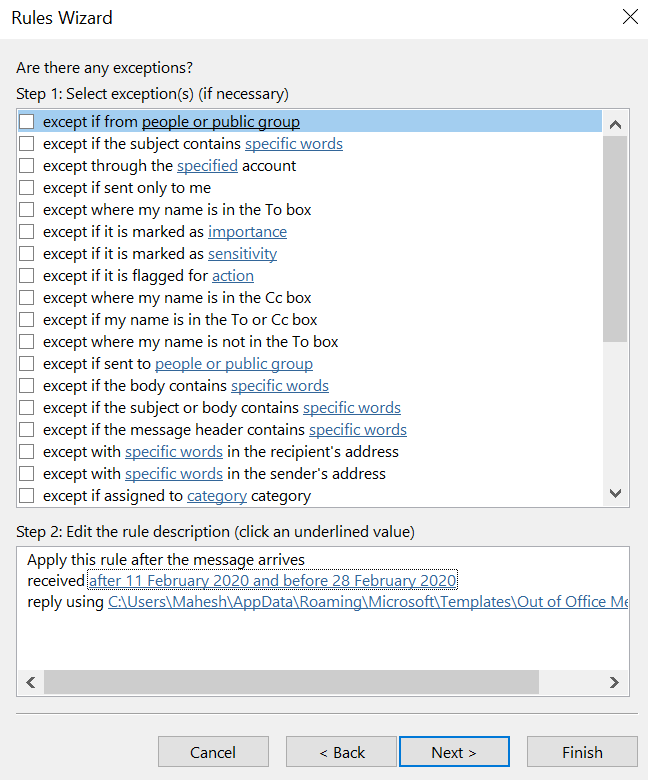
Optionally, apply any exceptions if you want and click on Next.
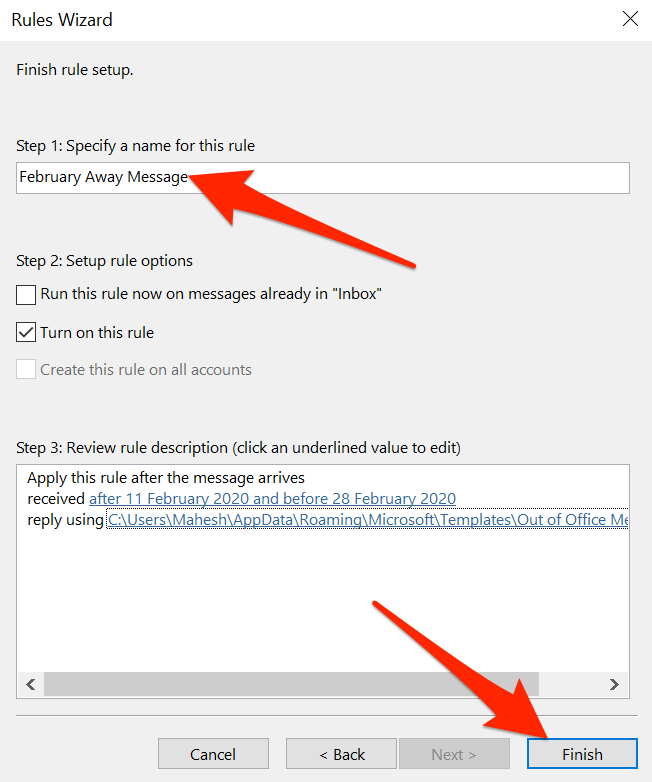
Enter a name for your rule and click on Finish.
Setting An Out Of Office Reply On The Outlook Web Version
A lot of users are ditching their desktop apps and replacing them with their web counterparts. If you’ve done that already and use the Outlook web version for your emails, you can set an out of office reply in Outlook for web, too.This one’s easier to do than any other methods discussed above.
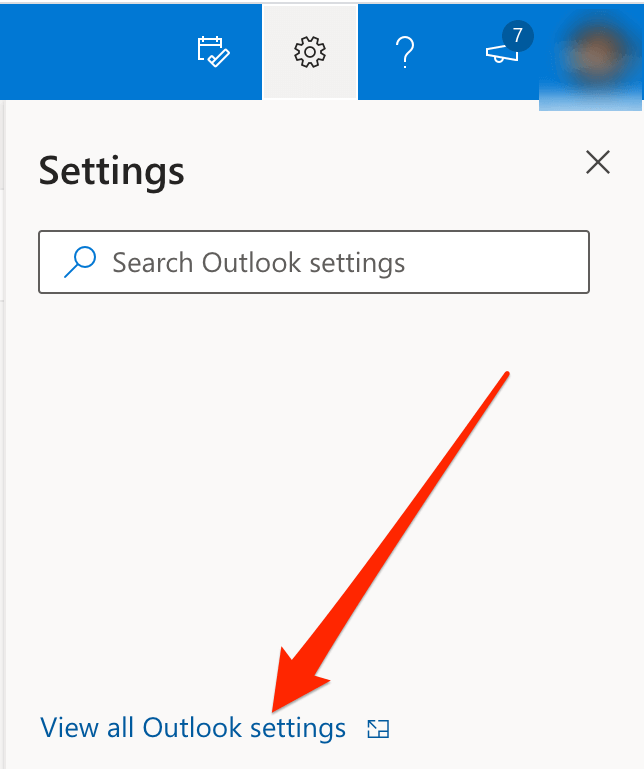
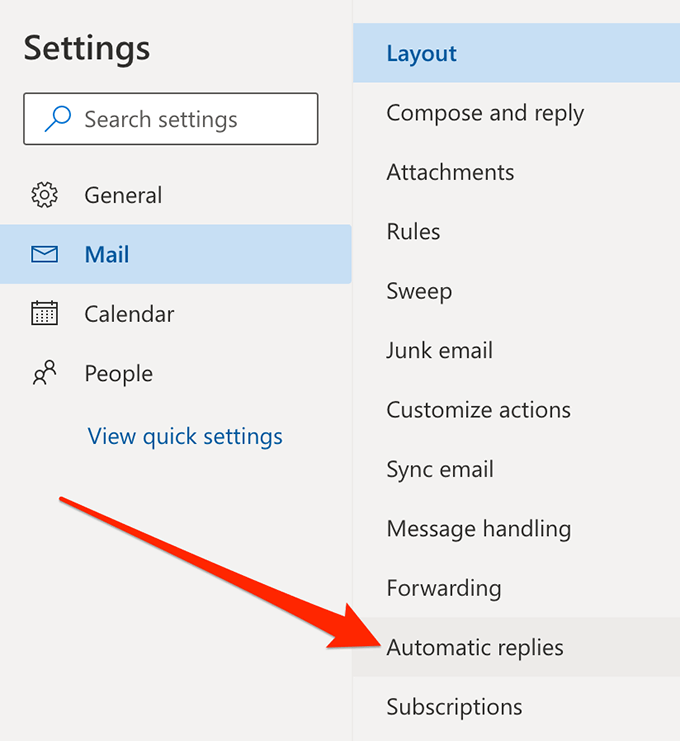
Head over to the Outlook website and log-in to your account if you aren’t already.Once you see your inbox, click on the settings icon at the top-right corner and then choose View all Outlook settings at the bottom. It’ll open the settings menu.
You’ll see several settings you can configure for your Outlook account. You want to find the option that says Automatic replies and click on it.
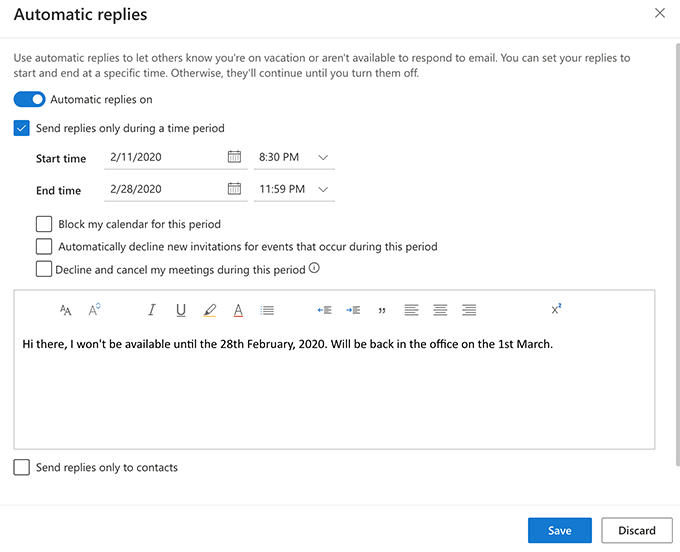
Several new options will appear on the right-hand side pane.First of all, enable the option that says Turn on automatic replies.Checkmark the Send replies only during a time period box. Specify a date range in both Start time and End time boxes. This is when the app will send out your automatic replies.You can then enter a custom reply that’ll be automatically sent to the people who email you. Feel free to use the available formatting options.Optionally, enable Send replies only to contacts if you only want to auto-respond to your contacts.Finally, click on Save at the bottom to save your changes.
Should you ever want to turn off automatic replies, just uncheck the Automatic replies on option.
It’s a really great thing to be able to set an out of office reply in Outlook. Let us know if you use it and what your auto-reply message looks like in the comments below.
