Deleting vs Wiping Data
Anyone can delete data. Moving items to the Trash Bin is not hard to do. But that’s not the same as wiping data. A deleted file can be recovered through a file recovery program or specalized hardware. Formatting a hard drive before selling is good practice but even that won’t be enough to wipe the data completely.That said, you need to be sure that you want to wipe your hard drive before you proceed. You will no longer be able to recover the wiped data after the process is complete.
Wiping Your Data
Follow the instructions below to wipe data off your Windows or Mac computer. We recommend using the built-in tools in the operating system in addition to third-party data destruction software in order to ensure complete and permanent data deletion.
Step
1: Do some prep work
Before you begin, you need to prepare for the hard drive cleanup. Here are some of the things you will need.
Data Destruction Software
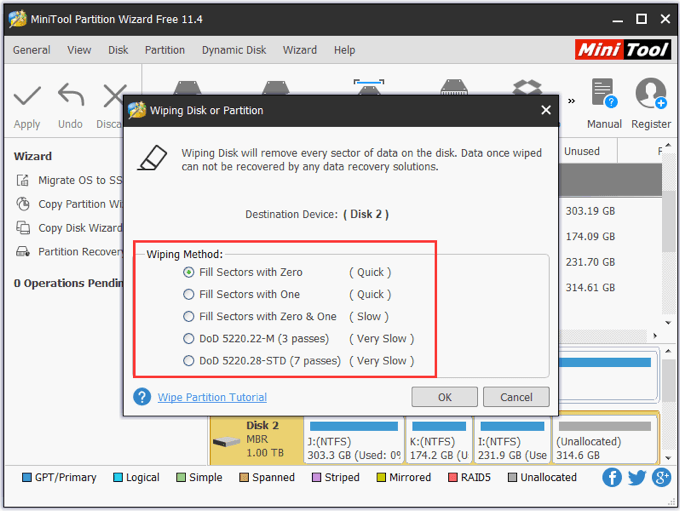
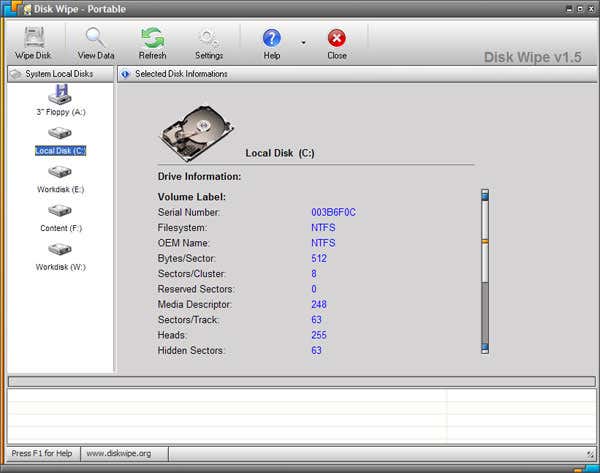
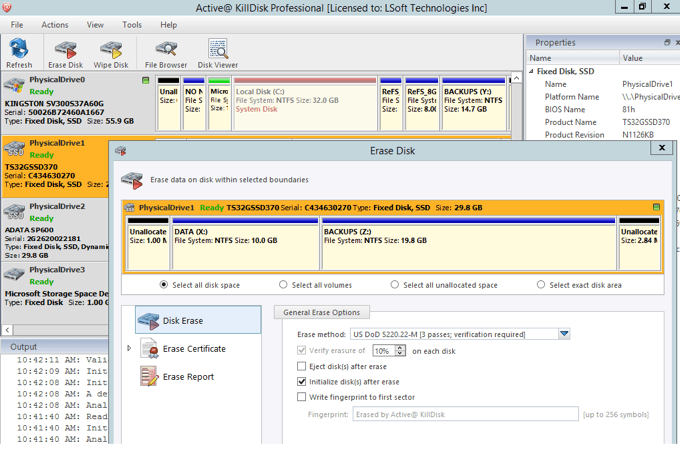
You will need to download a data wiping program for Mac or Windows. Some sanitization software can only wipe hard drives but not SSDs (solid state drives). You should also look for software that can work on bootable drives like flash drives if you’re wiping the entire computer.Here are our recommendations for Windows:MiniTool Partition Wizard – The free version of the program allows you to wipe a disk and gives you several options, including a super secure DOD option. Disk Wipe – A free, portable application with several different algorithms to securely wipe data. DBAN – This is one piece of software pretty much every website is going to be suggesting, so it’s also worth trying. They really try to up-sell you to their paid program, but you don’t really need it unless you’re a spy or a government agent. If you’re a Mac user, we have the following recommendations:Active@ KillDisk for Mac – The free version allows you to wipe a drive using the One Pass Zeros data wiping standard. If you need more secure methods, including the DoD option, you’ll have to purchase the app. For OS X users, you should try to use the built-in Disk Utility to securely wipe your Mac hard drive. We talk about that down below in Step 2a.
Data Backup
Needless to say, back up all important files before you proceed. You can copy-paste all your data to a temporary location outside of the drive you’re wiping.Explore your backup options. In Windows 10, go to Windows Settings > Update & Security > Backup. Here you’ll find several options for backing up your files.
Product Information
Be sure to have all your product information on-hand. Make sure you secure product keys for Windows, for example. You will need those if you’ll be reinstalling software on another machine down the line.
Bootable Disk
You will need a dedicated USB drive for your data destruction software. You won’t be able to run an application from your computer if you’re wiping it clean. That’s why you need to save the program on an external drive. Saving it on a CD would also work.Most sanitization programs are saved as an ISO image file. Simply copy-pasting the ISO file wouldn’t work. Read our guide on how to burn an ISO file to a CD or flash drive if unsure how to continue.
Step 2: Do a Windows Reset First
Go to Windows Settings > Update & Recovery > Recovery. Under Reset This PC, click Get Started.You will then be asked to choose an option. You can either keep all your files or remove everything. Click Remove Everything. Windows will proceed to delete all your files. Also, check out our step by step guide to resetting Windows 10 in case you run into issues with the steps above. Note: If asked whether you’d like to not only remove files but also clean the drives, select Remove Files and Clean the Drive.
Step 2a: Use Disk Utility on a Mac
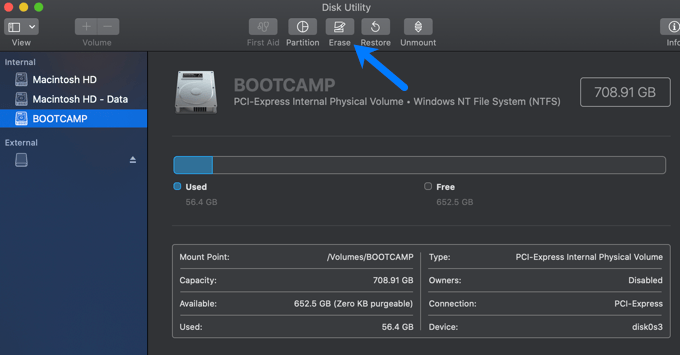
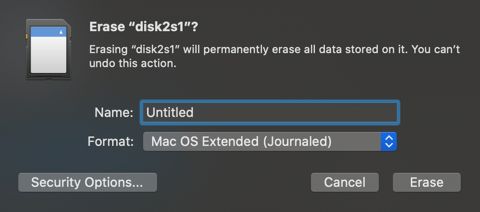
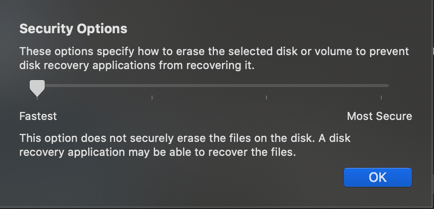
The steps for wiping your Mac hard drive are pretty straight forward. First, shutdown your Mac. Then press the CMD and R keys on your keyboard. While holding down the keys, turn your Mac back on. Keeping holding it down until you see the Apple logo and a loading screen. Let go and wait till you see the MacOS Utilities screen. Go ahead and select Disk Utility and then click Continue. You’ll see a list of all the drives in the left-hand pane. Select the top-level disk you want to wipe to select it and then click Erase. If you’re erasing the internal SSD, you’ll need to just select the format (normally APFS or Mac OS Extended Journaled) and scheme (almost always GUID Partition Map). If you’re erasing anything else, you’ll also see a button called Security Options. Here you will be presented with a slider that goes from Fastest to Most Secure. The Most Secure method will take much longer, but will securely wipe the data.
Step 3: Run the Data Wiping Program
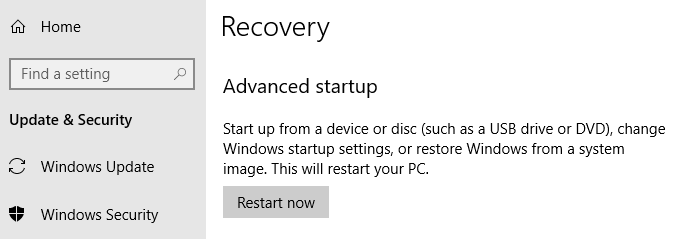
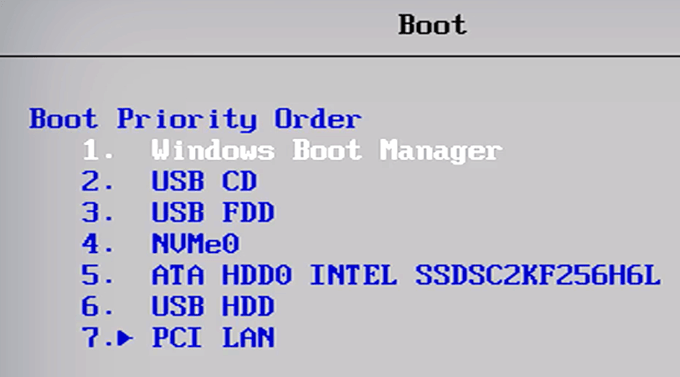
Each program runs differently but most come with easy-to-follow instructions. You will likely need to reboot your computer to run the program. Insert the CD or flash drive and then restart your PC. As it restarts, your PC should give you access to the data destruction software.If you’re having trouble loading the program, you’ll likely need to make some changes in your BIOS settings. To access BIOS, go to Windows Settings > Update and Security > Recovery. Under Advanced Startup, click Restart Now.On the next screen, go to Troubleshoot > Advanced Options > Select UEFI Settings > Restart. This will open BIOS after the system reboots.The BIOS interface will vary depending on what motherboard you use. However, all BIOS will allow you to change the boot order. Edit the order to prioritize CD/DVD or removable devices. This will let your computer run the content of your CD or flash drive respectively.
Step 4: Physically Wipe the Hard Drive (optional)
If there are no plans to use the hard drive again, you should consider physically wiping it. You can use a rare earth metal to do so. Others resort to dismantling the drive by screwing it apart before disposing of the entire thing.
